
I Built a DIY “Chase Car” Camera Rig for E-Bike Shots (and It Actually Works)
March 17, 2021
Some links in this article may be affiliate links. If you buy through them, we may earn a small commission at no extra cost to you.
For the longest time, “chase car footage” meant doing something sketchy: hanging out of a trunk with a camera and hoping for the best. I wanted the look without the risk, without permanently modifying a vehicle, and without spending movie-production money.
Read more: Want a discount on your Super73? Use my promo code here and Camera Vibration Isolator
So I put together a compact, hitch-mounted DIY chase car camera rig for filming e-bike rides—specifically for getting those cinematic tracking shots you see in bigger productions. The best part: it’s built from small, fairly affordable pieces, and it packs down into something you can actually live with.
The Goal: Smooth Tracking Shots Without a Huge Rig
What I wanted was simple: stable footage while driving behind (or alongside) an e-bike, with the camera floating smoothly instead of vibrating like crazy from road texture.
Mounting anything to a trailer hitch sounds perfect… until you remember a hitch is basically a vibration amplifier. Every bump, seam, and ripple gets translated straight into your camera.
The solution that made this whole setup viable was vibration isolation.
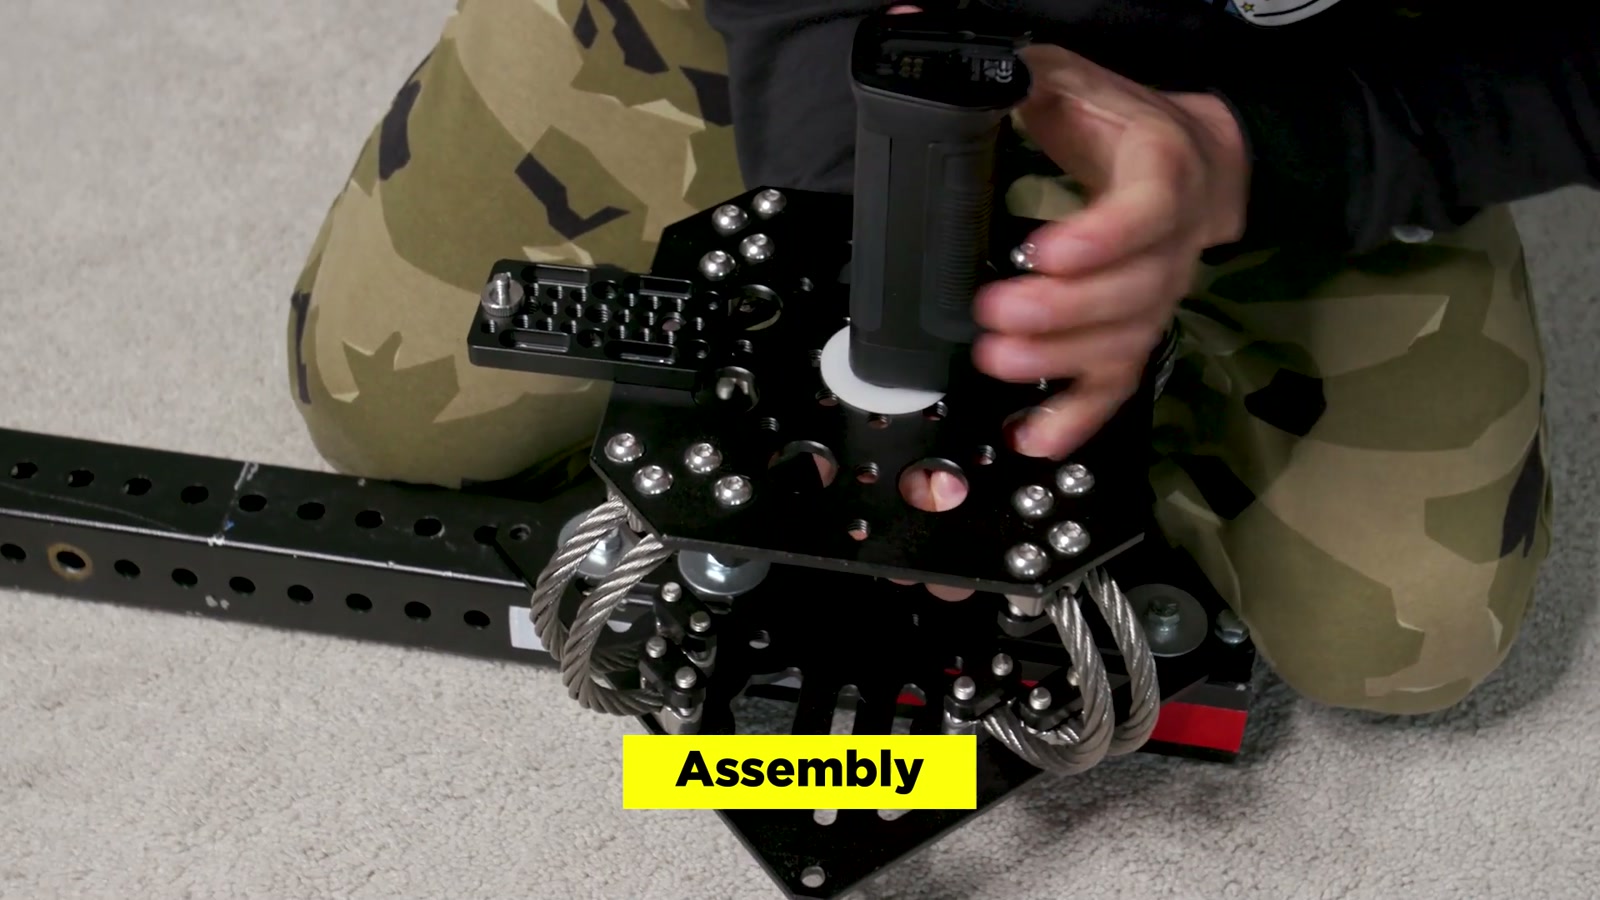
The Heart of the Build: A Hitch Mount With Vibration Isolation
The key component is an isolation plate (a camera vibration isolator) mounted to a steel perforated tube that slides into the vehicle’s hitch.
In practice, this does two important things:
It gives the camera/gimbal a solid, safe mounting point out back.
It helps cut down the harsh, high-frequency vibration that makes “car-mounted” footage look cheap.
I also added reflective red/white tape on the rear-facing side of the rig. It’s a small detail, but it matters when you’ve got gear hanging off the back of a car—anything that helps visibility is worth doing.
My Camera Setup (Built for Wide, Forgiving Framing)
For the camera, I ran a Fujifilm X-T3 paired with a Laowa 9mm wide angle lens. Wide angle is your friend for this kind of work because:
It’s easier to keep the rider in frame.
The motion feels faster and more dynamic.
Small bumps are less noticeable than they would be on a longer lens.
I typically kept the aperture around f/5 to f/8 so focus stays forgiving, since the camera position is fixed relative to the car, and distances can change quickly when you’re tracking a rider.

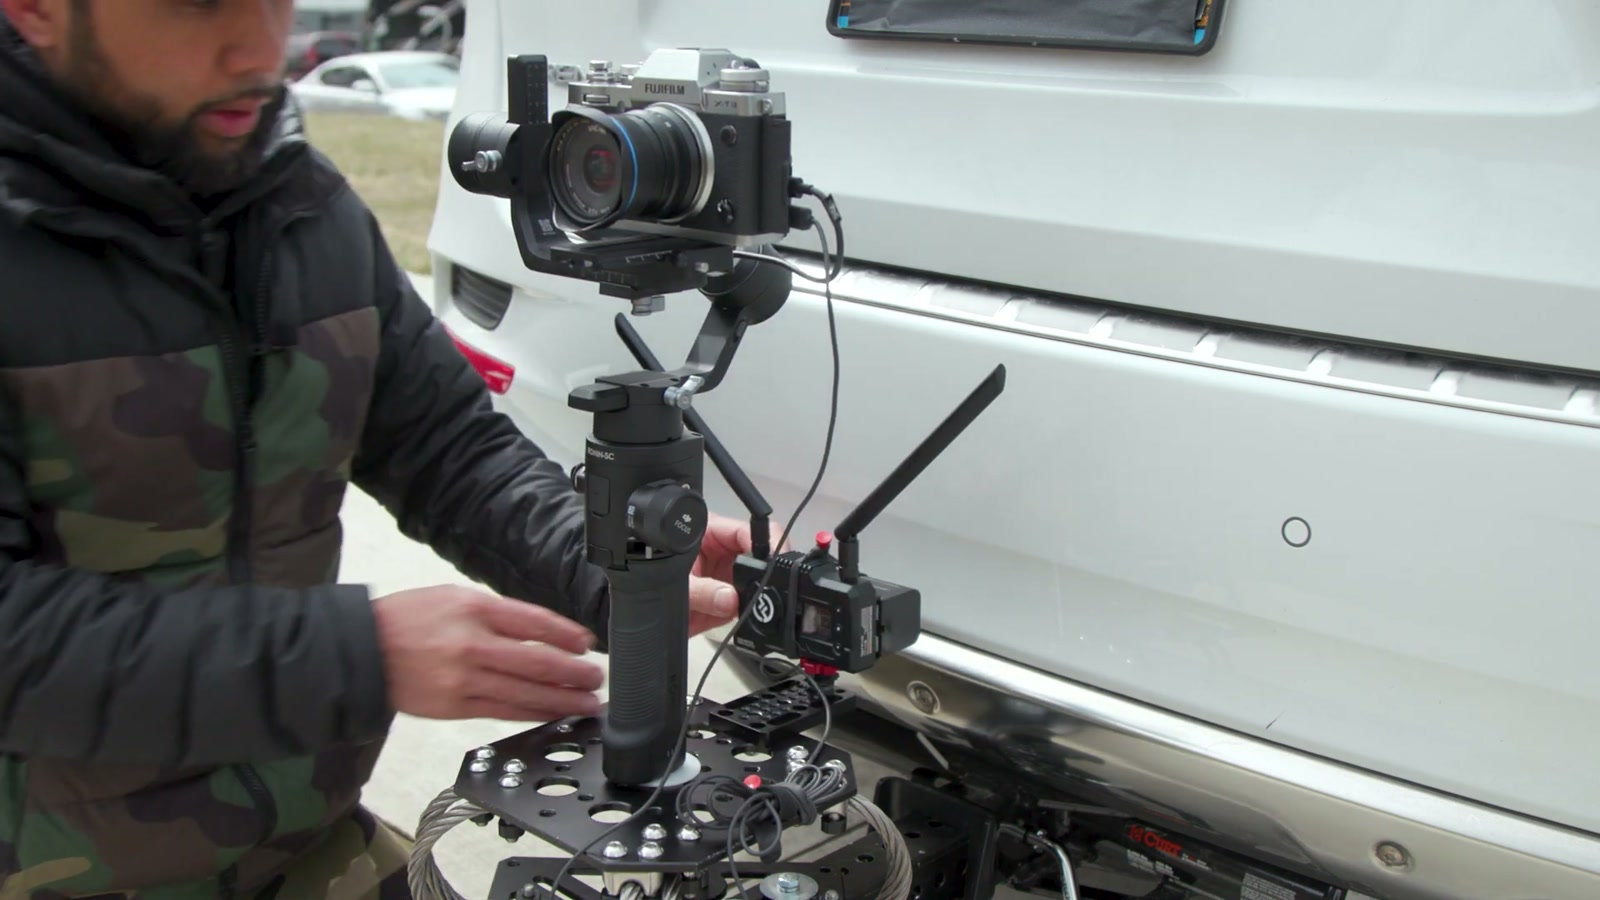
Stabilization: DJI Ronin-SC on the Back of the Car
Even with isolation, I still wanted the “floating” gimbal look—so I mounted a DJI Ronin-SC on the rig.
This combo (isolation + gimbal) is what gave me footage that feels dramatically more expensive than the setup actually is. The isolation plate tackles a lot of the ugly vibration, and the gimbal handles the smoother movements: panning, little framing corrections, and keeping the horizon from feeling chaotic.
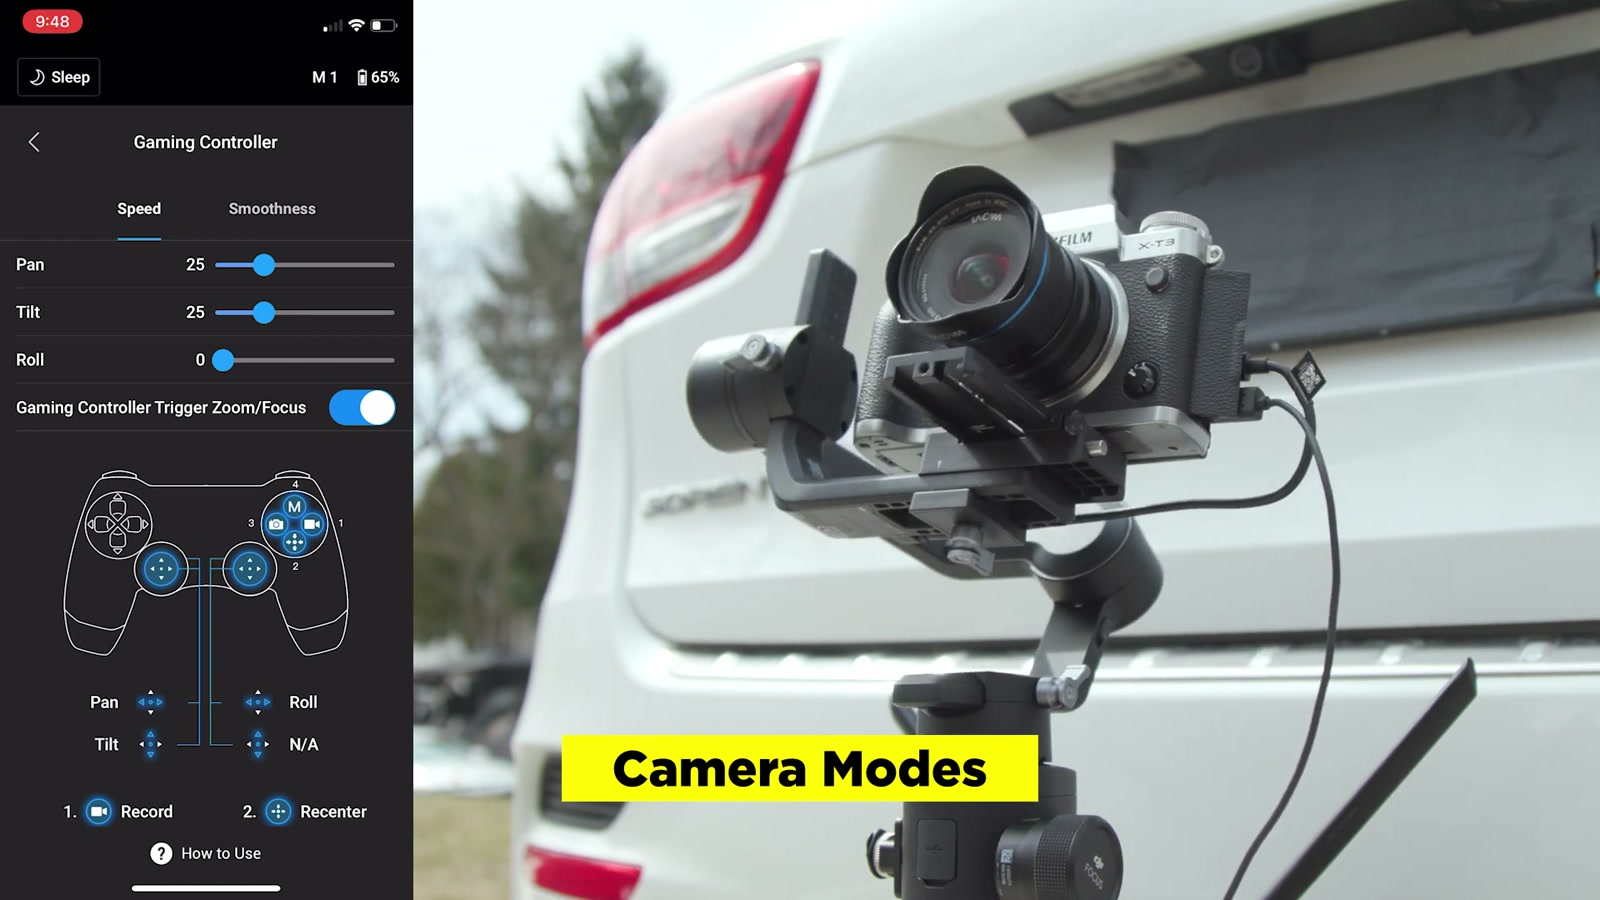
The Game Changer: Controlling the Gimbal With an Xbox Controller
This is the part I didn’t want to live without once I tried it.
Instead of buying specialized (often pricey) remote hardware, I used an Xbox Elite Wireless Controller over Bluetooth to control the gimbal. Once it’s dialed in, you can:
Pan and tilt smoothly while driving
Switch modes depending on how “floaty” or responsive you want the movement
Trigger functions like re-centering
I set up one mode that’s extra smooth and gradual (great for cinematic drifts and gentle follows), and another that’s a bit more responsive when I need quicker framing corrections.
Seeing the Shot Live: Wireless Video to an In-Car Monitor
To make this usable in the real world, I needed to see what the camera was seeing.
For wireless video transmission, I used a Hollyland Mars 400S Pro sending to a FeelWorld F5 Pro field monitor inside the car. Low latency and a stable connection were the priorities here, and in my testing it stayed solid and usable for chase-style work.
I mounted the monitor so it was easy for a camera operator to watch and make adjustments without wrestling with a laptop or awkward mounting.
Power-wise, the monitor can be run from the car’s 12V outlet, and I also used the monitor’s power pass-through to feed the receiver. That kept the in-car wiring cleaner and reduced battery juggling.
Installing It on the Car: The “No-Rattle” Details Matter
Mounting the rig is straightforward: slide the tube into the hitch, line up the holes, pin it, and lock it.
The important detail is eliminating play between the hitch and the tube.
I used an anti-rattle adapter to clamp everything tight. Before tightening, I lifted the tube slightly and then locked it down so it seated firmly. That one step made a noticeable difference—less clunking, less micro-movement, and a more confidence-inspiring mount overall.
Real-World Results: How It Feels and Looks on the Road
Once everything was balanced and running, the setup delivered exactly the vibe I was chasing:
The footage has that “chase car” cinematic perspective—close, wide, and dynamic.
Motion feels smooth and controlled rather than shaky and handheld.
Small framing tweaks are easy to do live, so the rider stays positioned where I want them.
The biggest takeaway is that this doesn’t feel like a compromise setup. It feels like a smart, scaled-down version of a much larger system.
The One Big Catch: You Need Teamwork
This is not a solo driver setup.
To do it safely and well, you need:
A driver focused only on driving
A camera operator focused only on framing/recording
It’s absolutely worth it for the results, but plan your shoots accordingly.
What We Like
Compact hitch-mounted solution that doesn’t require damaging or modifying the vehicle
Isolation plate makes a real difference in reducing vibration
Wide angle tracking looks cinematic and forgiving
Xbox controller gimbal control is surprisingly effective (and budget-friendly)
Wireless monitor setup makes it practical to operate from inside the car
Things To Consider
Requires two people (driver + camera operator)
Hitch mounts amplify vibration; you’ll want an anti-rattle adapter and isolation to get the best results
Rear-mounted rigs add length behind the vehicle—be mindful of clearance, parking, and tight turns
You’ll need time to balance the camera on the gimbal and dial in smoothness/speed settings
Final Thoughts
If you’re filming e-bike content and you’ve been trying to fake chase shots with awkward handheld work, this kind of DIY hitch rig is one of the highest-impact upgrades you can make.
What impressed me most is how “production” the footage feels once vibration is managed and the gimbal is remotely controllable. It’s a practical build that keeps the fun of DIY while delivering results that look legitimately cinematic.