
Easy Super73 Z1 Lighting Mods: A Simple 12V Headlight + Tail Light Upgrade (No Bike Battery Tapping)
January 2, 2021
Some links in this article may be affiliate links. If you buy through them, we may earn a small commission at no extra cost to you.
Stock Super73 Z1 lighting is one of those things you don’t think about until you’re riding late and realize you want more visibility—both for seeing the road and for being seen.
For my Z1, I wanted a clean, affordable lighting upgrade that didn’t involve tapping into the bike’s battery, cutting into factory wiring, or turning a simple mod into a full-on electronics project. The setup below nails that: a bright 12V headlight, a flexible LED strip tail light, and a separate rechargeable 12V battery tucked into a handlebar pouch.
If you’ve got minimal DIY experience but you’re comfortable soldering a couple of connections (or you’re willing to learn), this is a really satisfying quality-of-life upgrade.
The Goal: Better Night Riding Without Touching the Bike’s Electronics
The whole point of this lighting mod is simplicity and flexibility.
Because the lights run off a dedicated 12V battery pack, I didn’t need to:
Tap into the Z1 battery
Open up the bike’s electronics
Worry about compatibility with the stock electrical system
And the best part: this approach isn’t Z1-exclusive. You can adapt the same idea to other bikes because it’s essentially a self-contained lighting kit.
Headlight Setup: Car Reverse Light Brightness in a Retro Moto Housing
For the headlight, I built around an LED bulb that’s normally used as a car reverse light. That’s a clever hack for e-bike lighting because reverse lights are designed to throw a strong beam and illuminate a wide area without pulling a ton of power.
On the road, the first thing I noticed was how usable the beam pattern felt for real riding. It wasn’t a tiny spotlight that only lights up a small patch—it had a wider, more diffused spread, which made it easier to scan what’s coming up.
The retro motorcycle headlight housing also helps here. With the glass in the housing, the light output feels broader and less harsh than some bare LED setups.

Mounting it on the Z1 frame
To get a secure fit, I used EVF foam as spacers so the housing sat properly on the Z1 frame. Once it was snugged down, it felt solid—no sketchy wobble, no “temporary” vibes.
I also added a headlight grill for a tougher look and a little extra protection.
Tail Light Setup: Flexible LED Strip That’s Seriously Bright
For the rear, I went with a flexible LED strip tail light. It’s inexpensive, simple, and it punches way above its price.
This strip has multiple wires available, but for maximum brightness I only used the positive and negative leads. The result is a tail light that’s hard to miss—exactly what I want when cars are behind me.
Because it’s flexible, it’s also easier to mount cleanly than rigid lights that need a perfect bracket or a flat surface.
Wiring: Clean, Durable, and Easy to Service Later
I extended wiring where I needed it using 16 gauge silicone wire. That wire is flexible and forgiving for routing around handlebars and frames without feeling stiff or fragile.
For durability, I protected connections with heat shrink tubing, and then bundled/secured everything with zip ties so nothing flops around mid-ride.
To keep things tidy and modular, I combined the headlight and tail light leads into a single DC connector so everything plugs into the battery cleanly.
Power: A Separate 12V Rechargeable Battery Pack
Instead of pulling power from the bike, I used a TalentCell 12V rechargeable lithium-ion battery pack (11,000mAh). It also includes a USB port, which is handy if you want a backup power option for small devices.

In real use, the big win here is peace of mind:
My bike stays stock electrically
The lighting system is self-contained
Troubleshooting is simpler because it’s not integrated into the Z1’s wiring
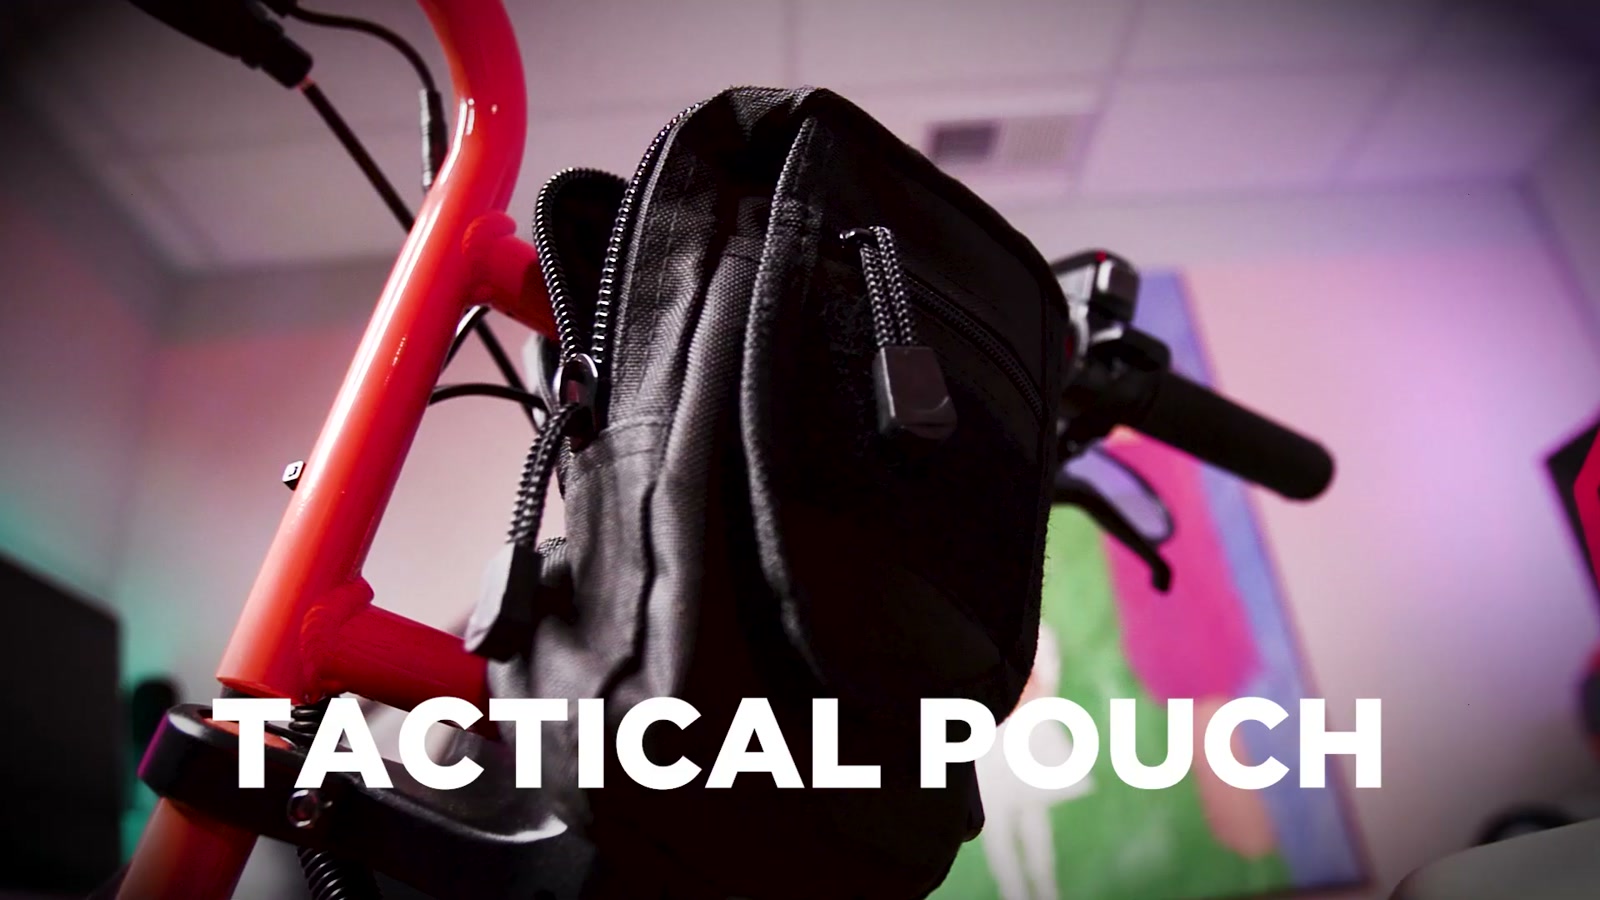
Storage: Handlebar Tactical Pouch = Perfect Battery Home
To mount the battery, I used a tactical molle pouch on the handlebars. It fits the battery pack well and feels purpose-built for this kind of mod.
On rides, I like that it’s not just “a battery bag.” It’s also useful storage for keys, tools, or anything small I want quick access to.
Real-World Ride Impressions
This setup made my Z1 feel way more night-ready.
The headlight gave me a wider, more practical field of view than I’d expect from a budget-friendly DIY approach, and the tail light is bright enough that I feel more confident about being noticed.
Just as important: because everything is mounted securely and the wiring is protected, it doesn’t feel like a fragile experiment. It feels like a legit upgrade I can ride with every day.
What We Like
No need to tap into the Super73 battery or electronics
Big improvement in night visibility and presence on the road
Wide, diffused headlight spread feels more usable for riding
Tail light is extremely bright when wired to positive/negative for max output
Modular setup with DC connectors makes it easier to remove or service

Handlebar pouch doubles as practical ride storage
Things To Consider
You’ll want basic DIY comfort (wiring, soldering, heat shrink) for the cleanest result
You’re managing a separate battery pack, which means another thing to charge
Cable routing matters—take your time so nothing rubs, pinches, or looks messy
Mounting fit can vary; foam spacers helped me get the headlight sitting right
Final Thoughts
If you want a simple lighting upgrade for a stock Super73 Z1 without opening up the bike’s electrical system, this is one of the most practical routes I’ve found.
It’s affordable, adaptable, and it genuinely improves how the bike feels after sunset—especially if you’re riding streets where you need both forward visibility and a strong rear presence.
We’re all about EV lifestyle upgrades that don’t have to be complicated, and this one hits that sweet spot: minimal fuss, maximum real-world benefit.