
Super73 Z1 48V Upgrade: My Hands-On Battery + Controller Swap for More Real-World Punch
July 21, 2020
Some links in this article may be affiliate links. If you buy through them, we may earn a small commission at no extra cost to you.
If you love the Super73 Z1 for its simple, lightweight vibe but you’ve always wanted a little more power and a little more “keep pulling” at speed, a 48V upgrade is one of the most satisfying mods you can do.

I swapped my Z1 over to a 48V battery and a 48V sine wave controller with a display, and the goal was straightforward: more usable power, better efficiency, and more range without ruining the Z1’s clean, stealthy look.
Before we get into the build, a quick reality check.
Proceed at your own risk
The moment you open the Z1 battery enclosure, you’re in warranty-void territory. You’re also working around high-current wiring that can spark if you short something. I chose not to splice high-voltage battery plugs whenever possible, insulated everything carefully, and took my time. If any of that sounds uncomfortable, it’s totally fine to stop here.
What I upgraded (at a high level)
I replaced the stock battery and controller with:
A 48V lithium-ion battery (I used a 48V 20Ah pack)
A 48V 9-MOSFET sine wave controller and matching display
A new thumb throttle
The sine wave controller was a big part of the “feel” goal here. I wanted smoother power delivery, not just a raw voltage bump.
Planning the fit: measure first, cut once
The Z1 enclosure is the whole game. If your parts don’t fit cleanly, the mod goes from “fun project” to “why did I start this?” really fast.
I measured the enclosure and compared it to the new parts before I removed anything:
Z1 enclosure interior: about 7.5" by 2.75"
Aftermarket battery: about 9.5" by 2.75"
Stock controller: about 6" by 1"
New controller: about 5" by 1.5" (shorter, but wider)
That battery length number looks scary on paper, but the trick is how the Z1 enclosure is shaped internally. With a little trimming inside, the pack can sit in there surprisingly well.
Tearing down the stock enclosure
Once I pulled the seat cover and opened the enclosure, I disconnected the battery first, then removed the controller.

A couple notes from the teardown:
There’s foam padding inside the enclosure that you can reuse later to help prevent movement.
The controller wiring uses a strain relief bushing that’s annoying without the proper pliers. I didn’t bother ordering special tools—I carefully cut it out instead.
I removed the stock charging port, power port, and switch because my plan was to power on/off from the new display and keep the battery removable.
Battery wiring differences that matter
The new 48V battery I used had two main leads: one for discharge and one for charging. The stock setup also includes extra wiring for the Z1’s on/off switch.
For this build, I didn’t rely on an external switch because the display can control power. Long term, I still like the idea of adding an anti-spark switch (I planned one), but I didn’t build it into the enclosure at this stage.
Making space inside the enclosure (and protecting the battery)
This was the most “custom” part of the whole upgrade.
Inside the Z1 enclosure, there are plastic tabs/fins that limit the usable space. I trimmed some of those tabs to open up room for the battery and controller.
Important: after cutting, I smoothed every jagged edge (Dremel + sanding). The last thing you want is a sharp edge rubbing into a battery pack over time. Vibration is real on these bikes.
I also trimmed the middle fin section so the battery could sit properly, then checked the fit repeatedly.
Wiring the motor to the new controller
The stock motor cable needed to be adapted to the new controller.
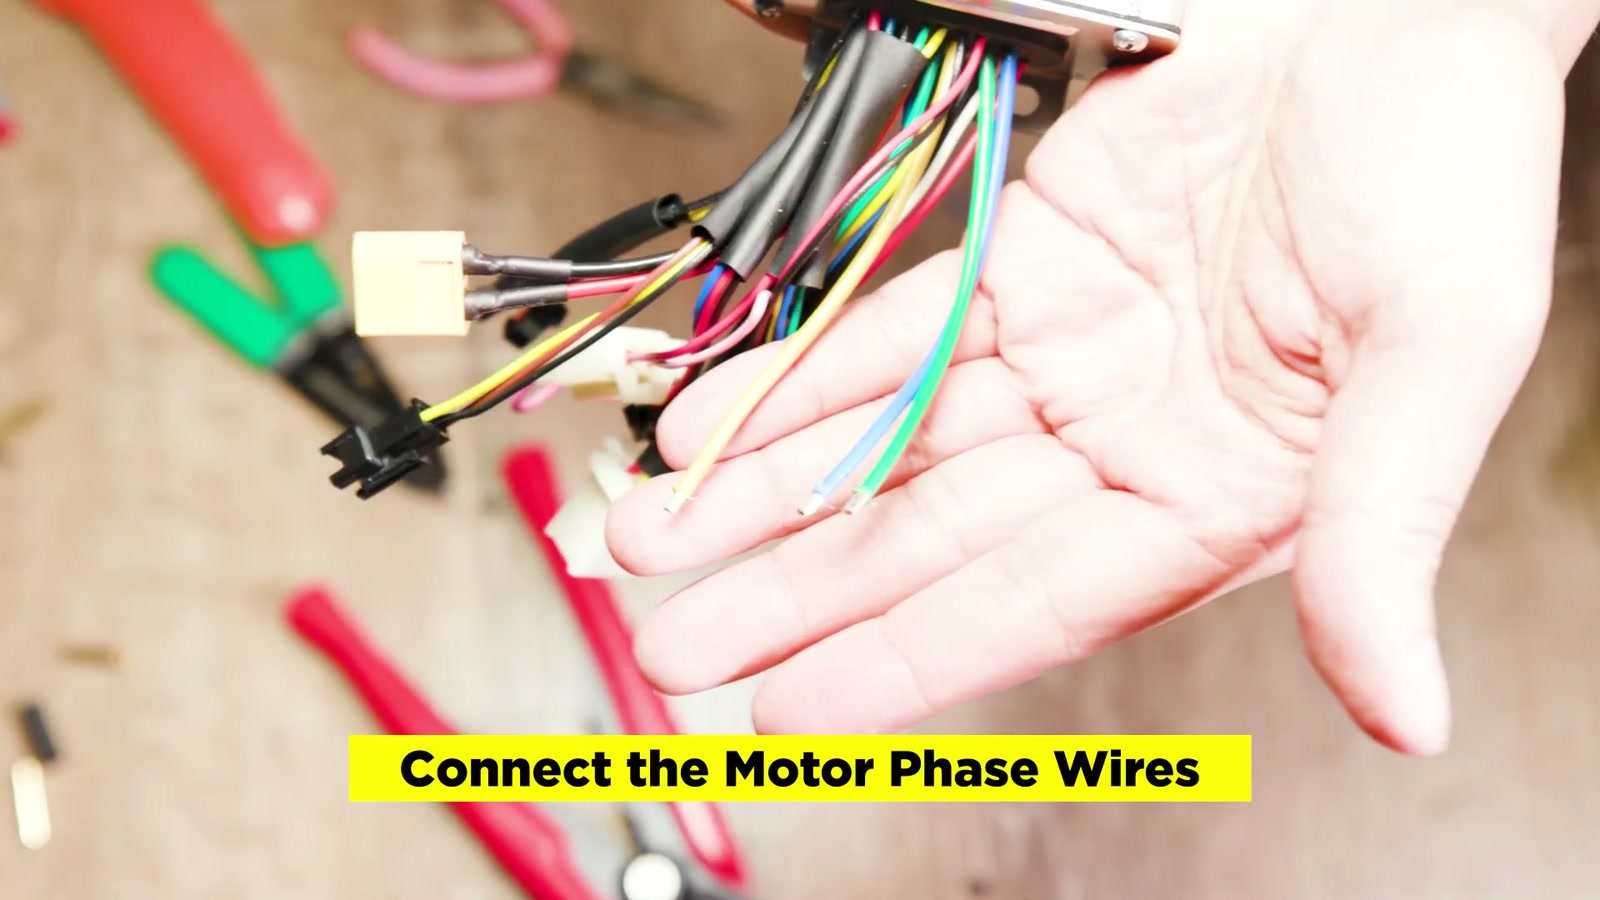
Phase wires
I cut the motor cable with enough length to reach the controller inside the enclosure, then stripped the three motor phase wires.
I chose to solder bullet connectors so the phase connections are solid and serviceable. You can hard-solder directly if you prefer, but I liked having connectors for troubleshooting.
Match colors (yellow/yellow, green/green, blue/blue)
Heat shrink everything
Add extra insulation and strain relief (I used tape and zip ties)
Hall sensor wires
This part is tedious, but it’s straightforward:
The controller had a 6-wire hall bundle (red, white, yellow, green, black, blue)
The motor side had matching colors plus two extras (purple and orange)
I soldered and heat-shrunk each matching hall wire one by one, then insulated the extra purple and orange wires individually so they couldn’t short on anything.
After that, I wrapped the entire hall bundle in a larger heat shrink sleeve to protect the whole splice area.
Skipping pedal assist (on purpose)
The controller had a pedal-assist lead, but I didn’t install PAS. On a Z1, I personally prefer throttle-only simplicity. If you change your mind later, it’s one of the easier add-ons.
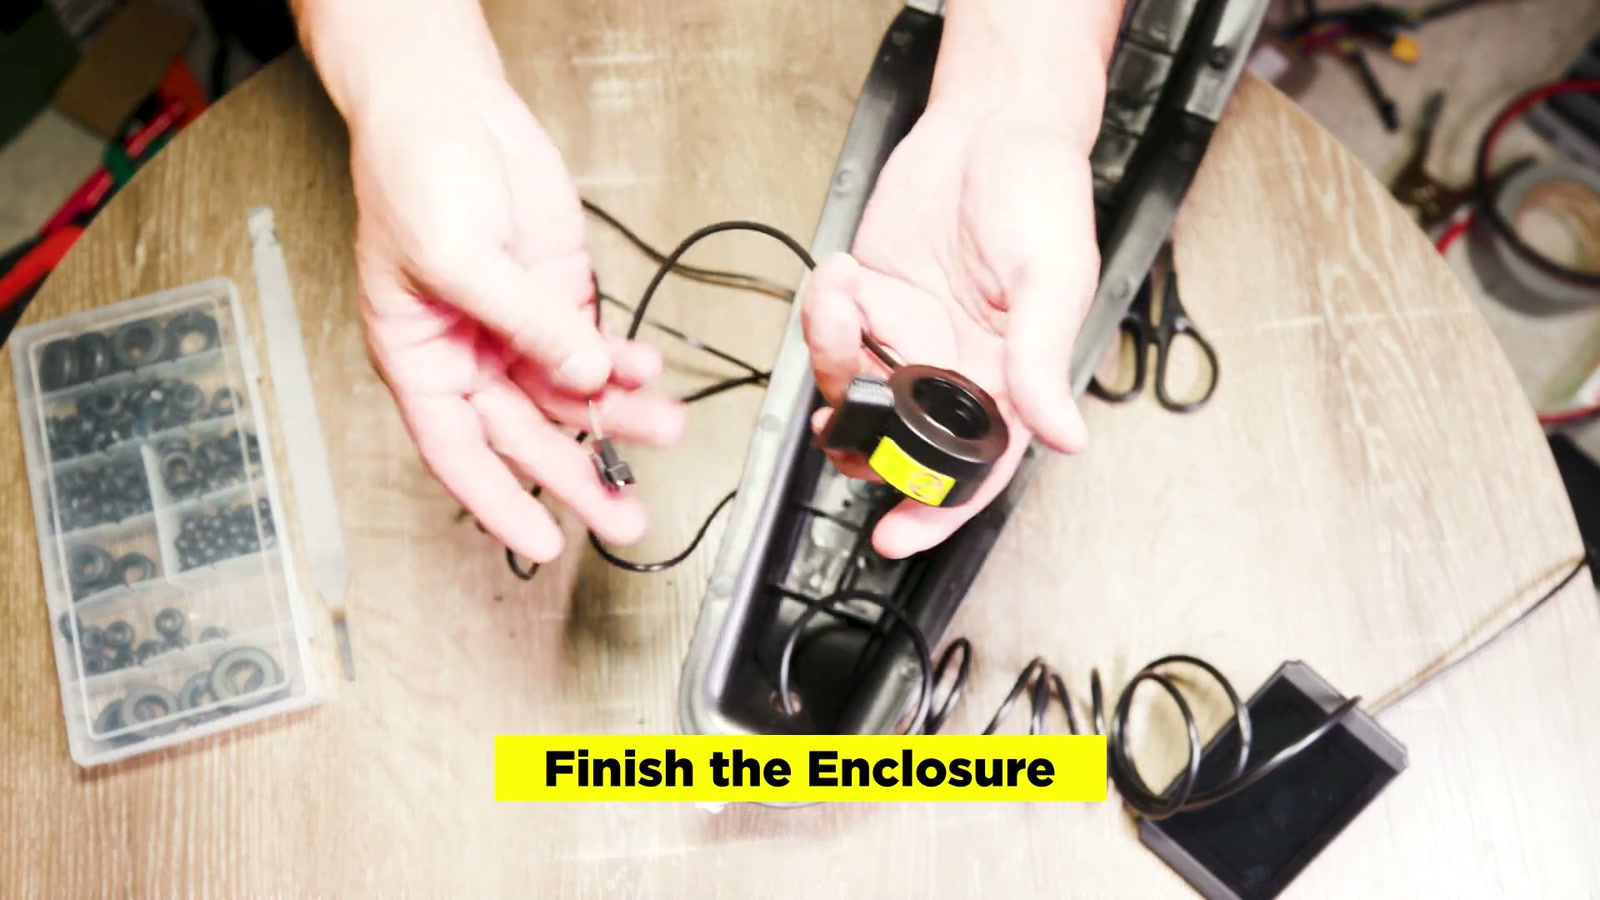
Weatherproofing and wire routing improvements
Because I wasn’t using the stock power button and charging port at this stage, I plugged those openings with rubber grommets and secured them with hot glue.
I also had to slightly enlarge the exit hole for the display connector—it was just a bit too tight to pass through cleanly. A file did the job.
My goal here was:
No wires pinched by the enclosure
No slack flopping around outside the frame
Everything snug enough to survive vibration without rubbing or tugging
Mounting the battery (removable, because real life)
I don’t keep my bike in a garage, so I wanted to bring the battery indoors. That means the battery needed to be removable from the enclosure.
I used Velcro to secure the battery in place while still allowing easy removal.
Once it was seated, it fit surprisingly well and kept the Z1’s stealth look. That was a big win—no weird external battery box vibe.
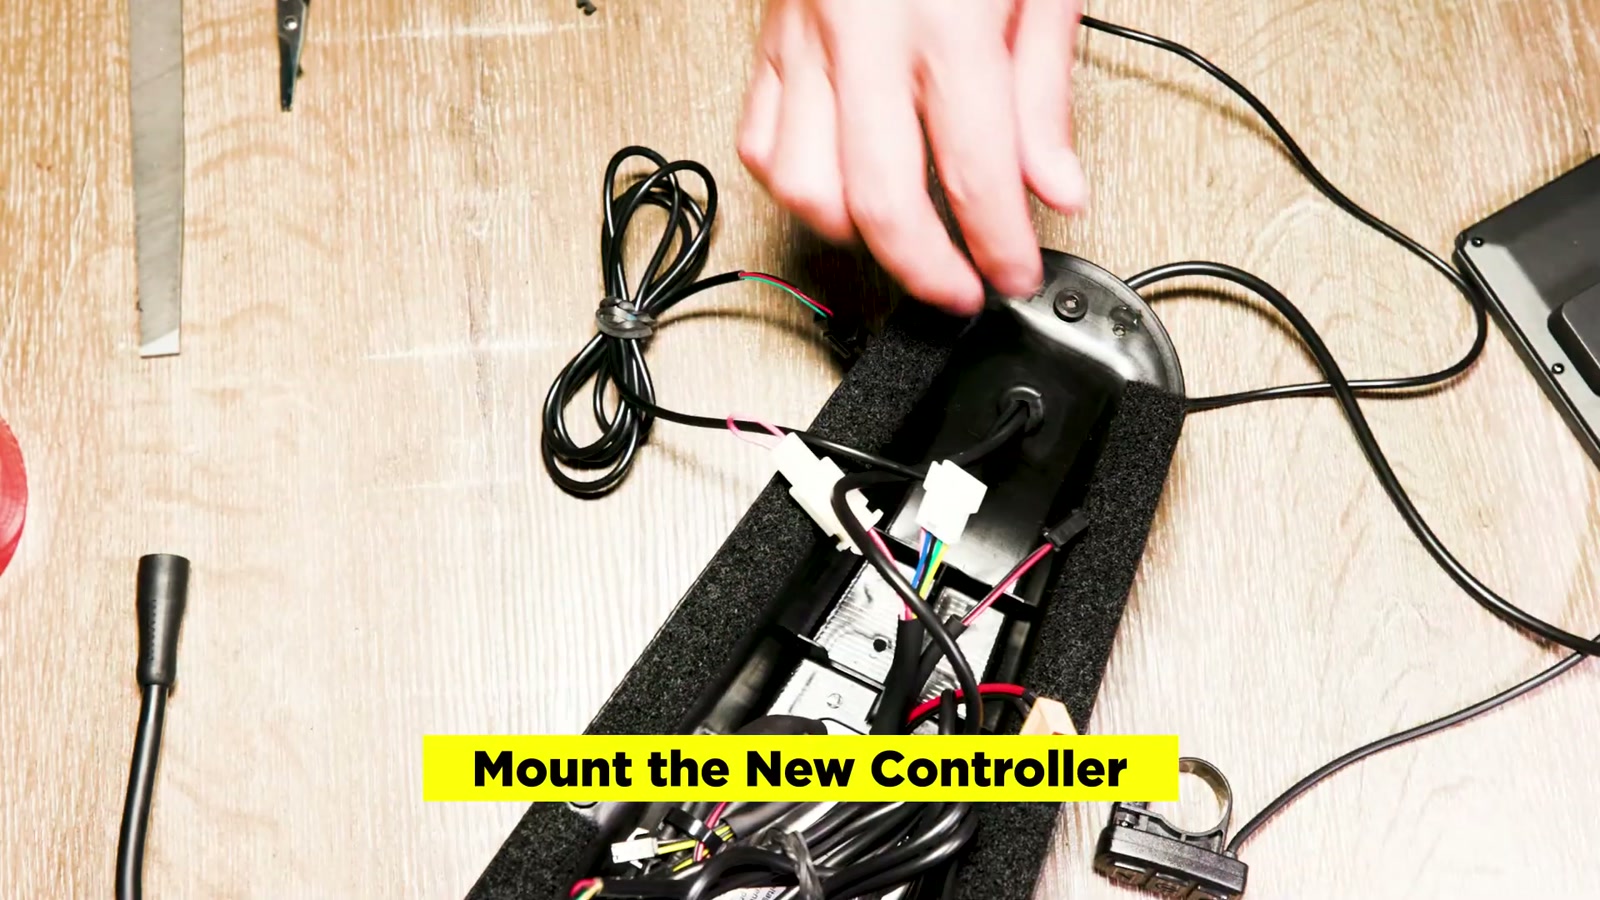
Mounting the controller securely
I mounted the controller inside the enclosure using hardware and tape to keep things aligned and secure. The key here is stiffness: if the controller can rattle, eventually something will fail.
I also reused leftover foam from the stock setup to help fill space and reduce movement.
Controller setup and a throttle gotcha
With everything connected, I went through the controller/display settings:
Set the speed limiter to max
Set wheel size to 20" (since the Z1 is 20" wheel)
Set the unit to MPH/Fahrenheit
Disabled pedal assist functions since PAS wasn’t installed
One problem I hit: the throttle didn’t work at first.
The fix was simple but important: the throttle’s negative wire pin was in the wrong position. I swapped the pins so red matched red, black matched black, and the remaining wires aligned correctly. After that, the throttle icon appeared and the throttle responded.
Installing on the bike: throttle + display feel upgrade
Once the enclosure was back in the frame, I installed the new thumb throttle and display on the bars.
I genuinely prefer this throttle to the stock one:
It’s smaller
It can sit closer to the grip
The display adds way more control and feedback than the Z1 normally gives you
And from a day-to-day EV lifestyle standpoint, having a display makes the Z1 feel less like a toy and more like a tuned little commuter.
First impressions
Even before doing any long-range testing, the bike immediately felt like it had more in reserve.
The upgrade delivered what I was chasing:
More power on demand
Better efficiency potential (especially with a smoother sine wave controller)
A more “complete” cockpit experience with the display
The part that made me happiest was how clean the finished result looked. The battery fit was almost perfect, and the bike kept that low-key Z1 silhouette.
What We Like
Noticeably stronger, more confident power delivery
Sine wave controller feel is smoother and more refined
Display + new throttle modernizes the Z1 experience
Battery fit can be very clean and stealthy inside the stock enclosure
Removable battery setup is clutch if you store the bike outside
Things To Consider
You can void your warranty as soon as you open the enclosure
High-current wiring can spark; insulation and careful routing aren’t optional
Hall sensor splicing is time-consuming and easy to mess up if you rush
The display connector may require enlarging the enclosure exit hole
Aftermarket parts quality varies by seller; plan for troubleshooting
Final Thoughts
This 48V upgrade made my Super73 Z1 feel like the version it always wanted to be—still compact and simple, but with better punch and a more usable, efficient ride. The best part is that I didn’t have to ruin the look of the bike to get there.
If you’re the kind of rider who loves the Z1 platform and wants more real-world capability without jumping to a whole new e-bike, this is a seriously rewarding project—as long as you respect the wiring, take your time, and build it like it needs to survive thousands of bumps.