
DIY Sur-Ron X Lighting Kit: The Clean, Practical Way I Added a Real Headlight, Signals, and Brake Lights
September 12, 2021
Some links in this article may be affiliate links. If you buy through them, we may earn a small commission at no extra cost to you.
If you’ve spent any real time on a Sur-Ron X after dark (or even just riding around traffic at dusk), you already know the bike begs for better visibility. The stock setup works, but it’s not built around the kind of on-road awareness I want: clear turn signals, a more “motorcycle-like” headlight look, and brake lights that actually get attention.

So I put together my own DIY lighting rig. Not a single boxed “kit” with mystery parts—just a carefully chosen set of components, some basic wiring, and a plan to keep it all looking clean when it’s done.
Below is exactly how the build went for me, what mattered most in real riding, and what I’d recommend if you’re considering doing the same.
The goal: visibility without the bulky look
I wanted three things:
A headlight that looks and feels more like a light bar setup
Turn signals that don’t stick out and get snapped off
A rear lighting setup that’s bright, obvious, and tidy under the seat
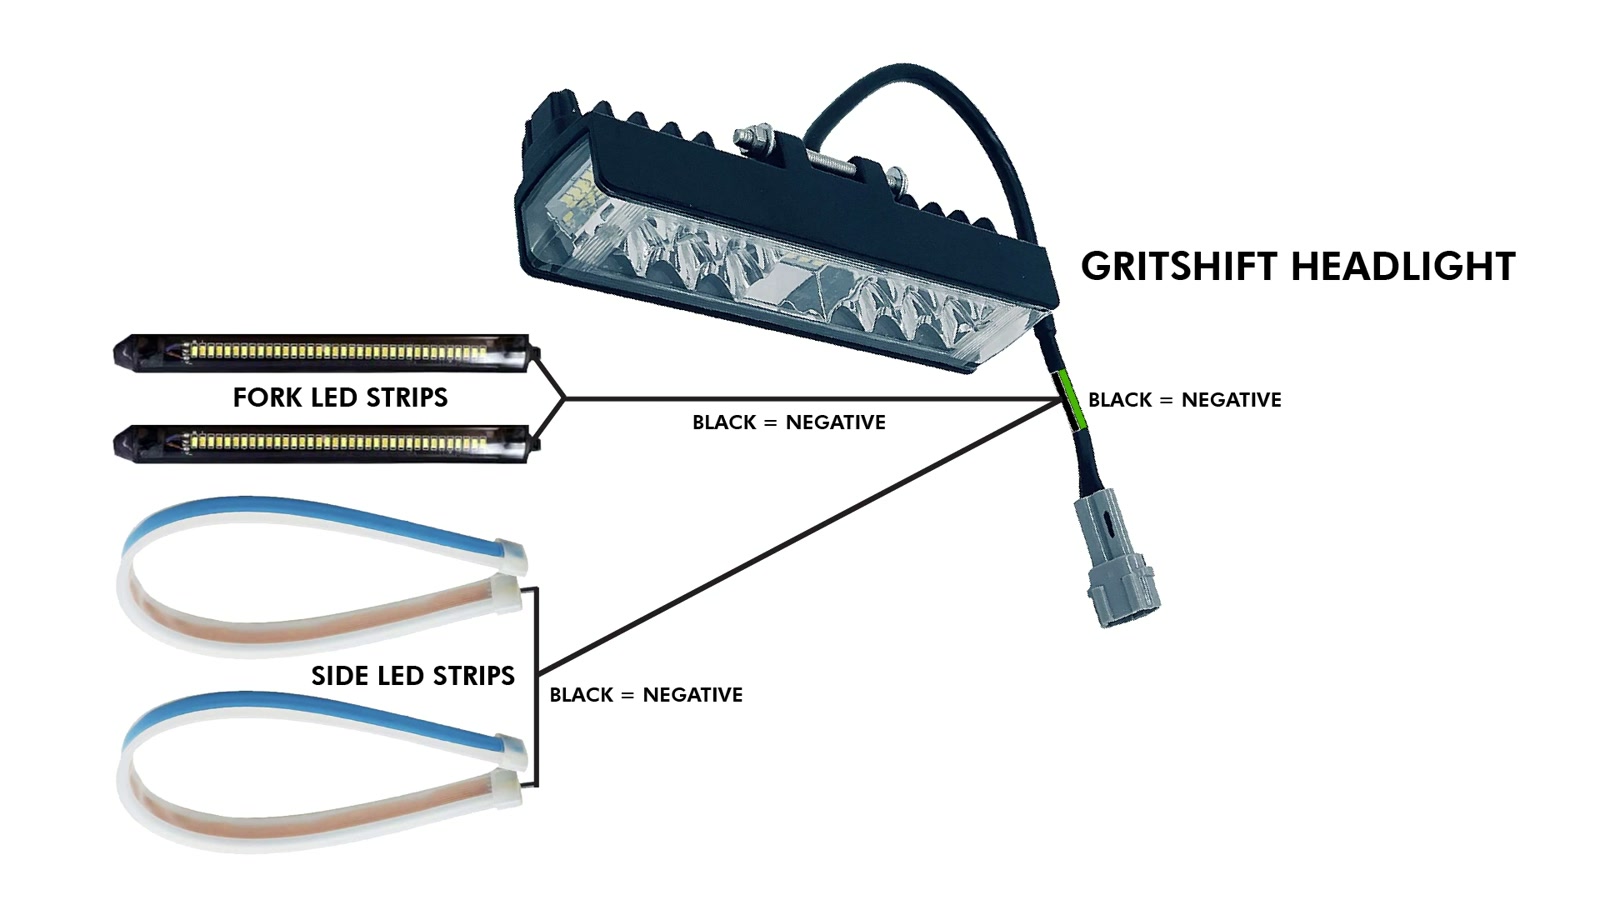
The theme of this build was low-profile and practical. I used wrap-around fork LEDs up front instead of traditional “lollipop” indicators, added side LED strips for extra side visibility, and swapped the rear for an under-seat tail light plus an additional LED brake strip for more punch.
Parts I used (and why)
Headlight + on/off control
The Sur-Ron headlight behavior is simple: turn the bike on and the headlight comes on. I wanted an actual way to shut the headlight off when I didn’t need it, so I used a plug-and-play kill switch in-line with the headlight.
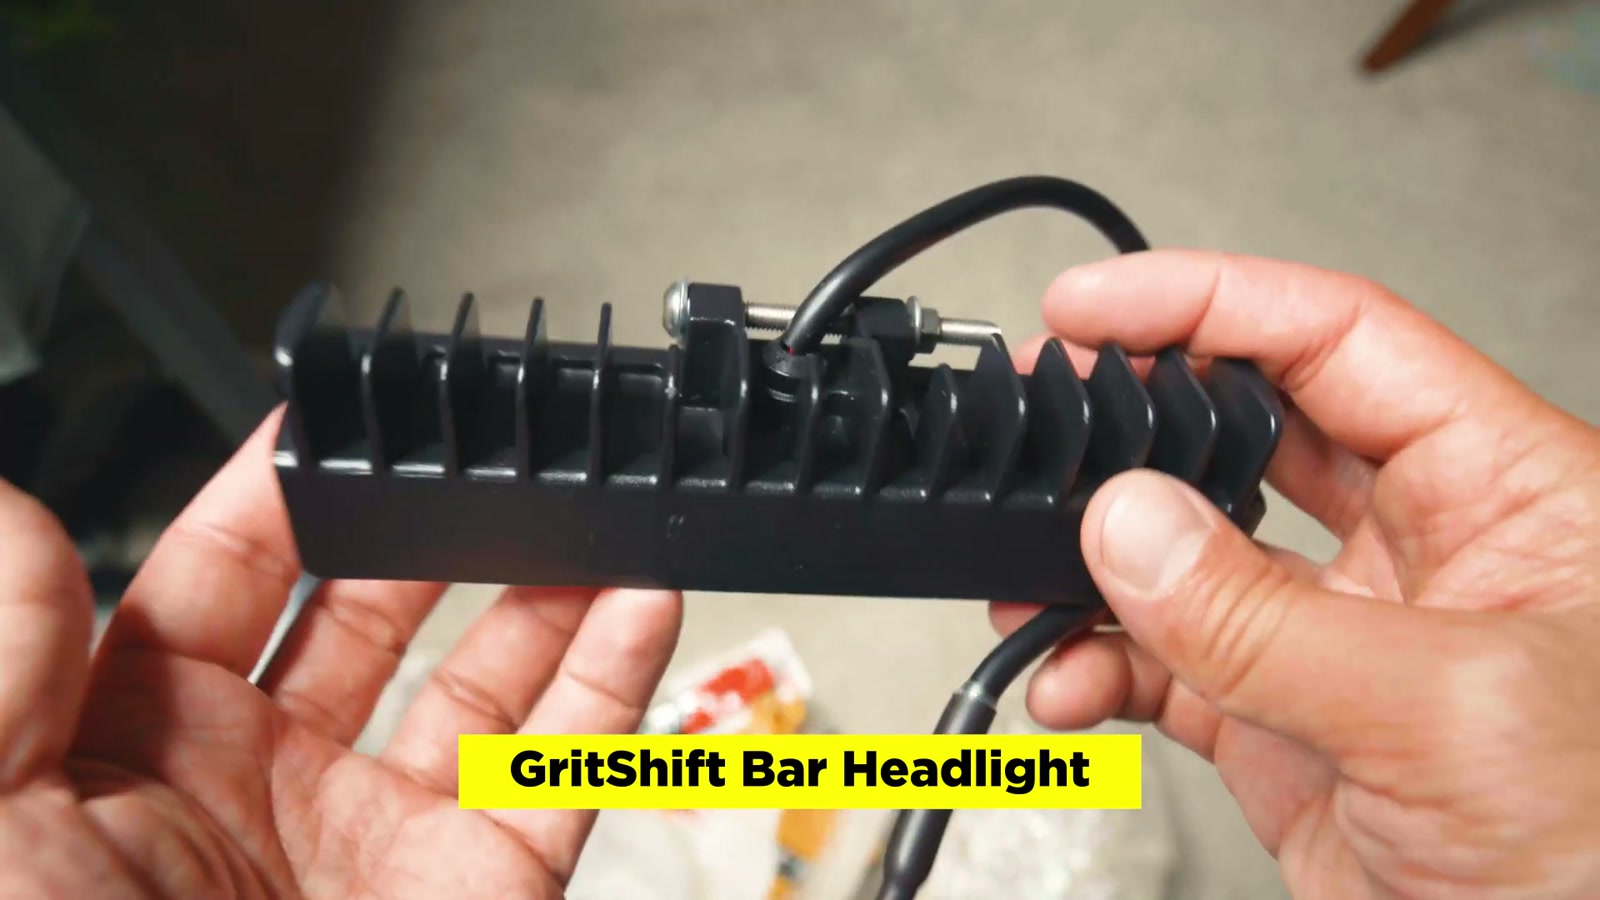
I also swapped to a GritShift light bar style headlight because I wanted a different look than the stock unit.
Switchgear that adds turn signals (without losing Sur-Ron functions)
To add signals, I replaced the stock switch with a signal switch that also has high/low beam inputs. The trick is mapping those inputs to the Sur-Ron’s existing ECO and SPORT mode wires so I don’t lose the riding modes. The end result is a handlebar control setup that feels more “normal” for signaling and horn use.
Low-profile signals
Fork LED signals: clean, tucked, and hard to snag
Side LED strips: these add extra “I’m here” visibility from angles, and the sequential effect looks great at night
Rear visibility: tail + brake lighting
For the tail, I used a circular tail light mounted under the seat area. It didn’t line up perfectly with the stock holes, so I fabricated a simple bracket solution with basic L-brackets.
Then I added an additional LED strip brake light underneath for extra brightness.
Tools and skills you’ll realistically need
This isn’t difficult, but it’s not “no-tools, no-thinking” either. If you’re comfortable doing basic electrical work, you’ll be fine.
What I relied on most:
Multimeter (for polarity checks at the rear)
Soldering iron + heat shrink (for strong, tidy splices)
Wire stripper/crimper + crimp connectors (especially helpful at the tail for serviceability)
Heat gun
Cloth tape + zip ties (for the final clean harness look)
Thin 20AWG wire (for running extensions through the frame)
Installation notes that mattered most
1) Safety first: battery and breaker
Before touching anything, I disconnected the battery and shut off the circuit breaker. You’re working around wiring and it’s just not worth gambling here.
2) Display relocation
Because I changed the switch setup, I relocated the display using a relocator bracket. This ended up being a nice ergonomic upgrade too—my display sits where I actually want it on the bars.
3) Wiring the new switch while keeping ECO/SPORT
The stock switch wiring includes:
White: sport mode
Green: eco mode
Black: horn signal
Red: 12V horn
On the new signal switch, I mapped:
High beam input to Sport
Low beam input to Eco
Horn signal to horn signal
12V horn to 12V horn
That preserved the bike’s core functions while giving me a proper left/right signal control.
4) Adding a flasher relay
To make signals actually flash correctly, I added a flasher relay and wired it into the signal feed.
5) A key trick: keeping mode buttons powered even when lights are off
One thing I didn’t want was for my ECO/SPORT buttons (now tied to the high/low inputs on the new switch) to lose power when I turn lights off.
So I tied the headlight feed from the new switch into 12V at the kill switch in a way that keeps those mode-button circuits alive, while still allowing the kill switch to shut the headlight/signals off.
6) Combining wires cleanly (and why it matters)
This build has multiple points where several wires need to be joined together (left signals, right signals, shared power, shared ground).
My process:
Strip wires
Braid together with pliers
Solder
Heat shrink
Wrap and secure with cloth tape
Doing it this way kept my harness from becoming a rattly mess and helped avoid shorts.
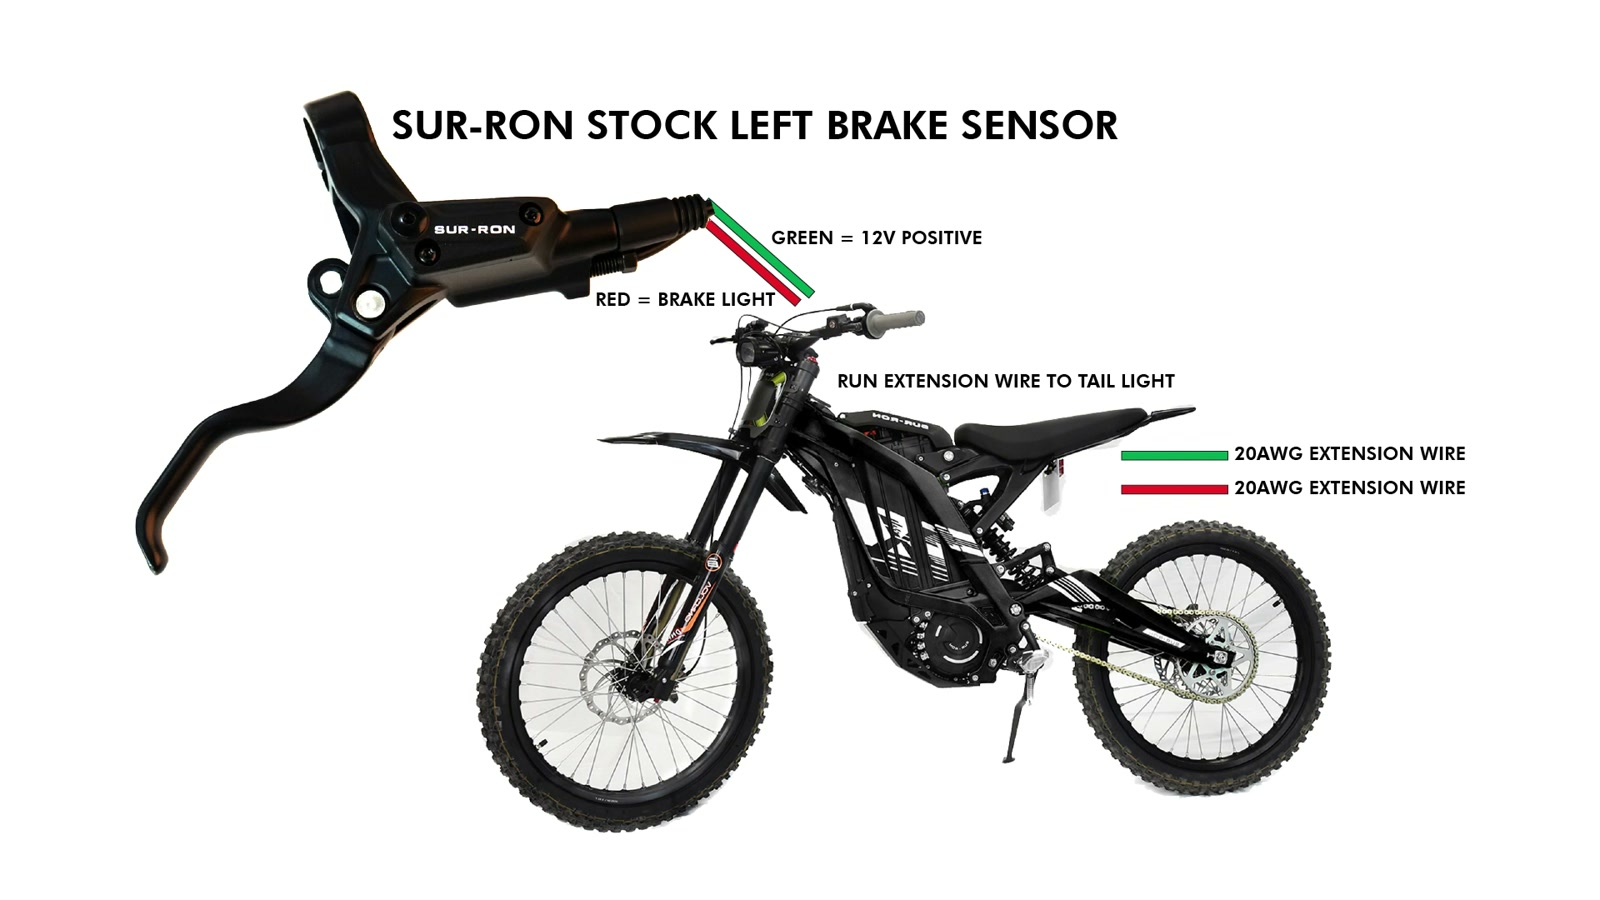
7) Brake light behavior: left lever only
I set it up so:
Left brake lever triggers brake lights
Right brake lever stays focused on regen behavior
To do that, I left the right brake sensor wiring alone and routed an extension from the left brake sensor wiring back through the frame to the tail.
8) Rear polarity check
At the tail, I used a multimeter to identify positive/negative on the bike’s rear connection, then marked polarity so I wouldn’t forget later.
9) Brackets for the tail light
The circular tail light didn’t match the stock mount holes, so I used simple steel L-brackets from a hardware store to get it mounted securely.
It’s not complicated, but it’s the kind of step that makes the difference between “temporary” and “this looks like it belongs here.”
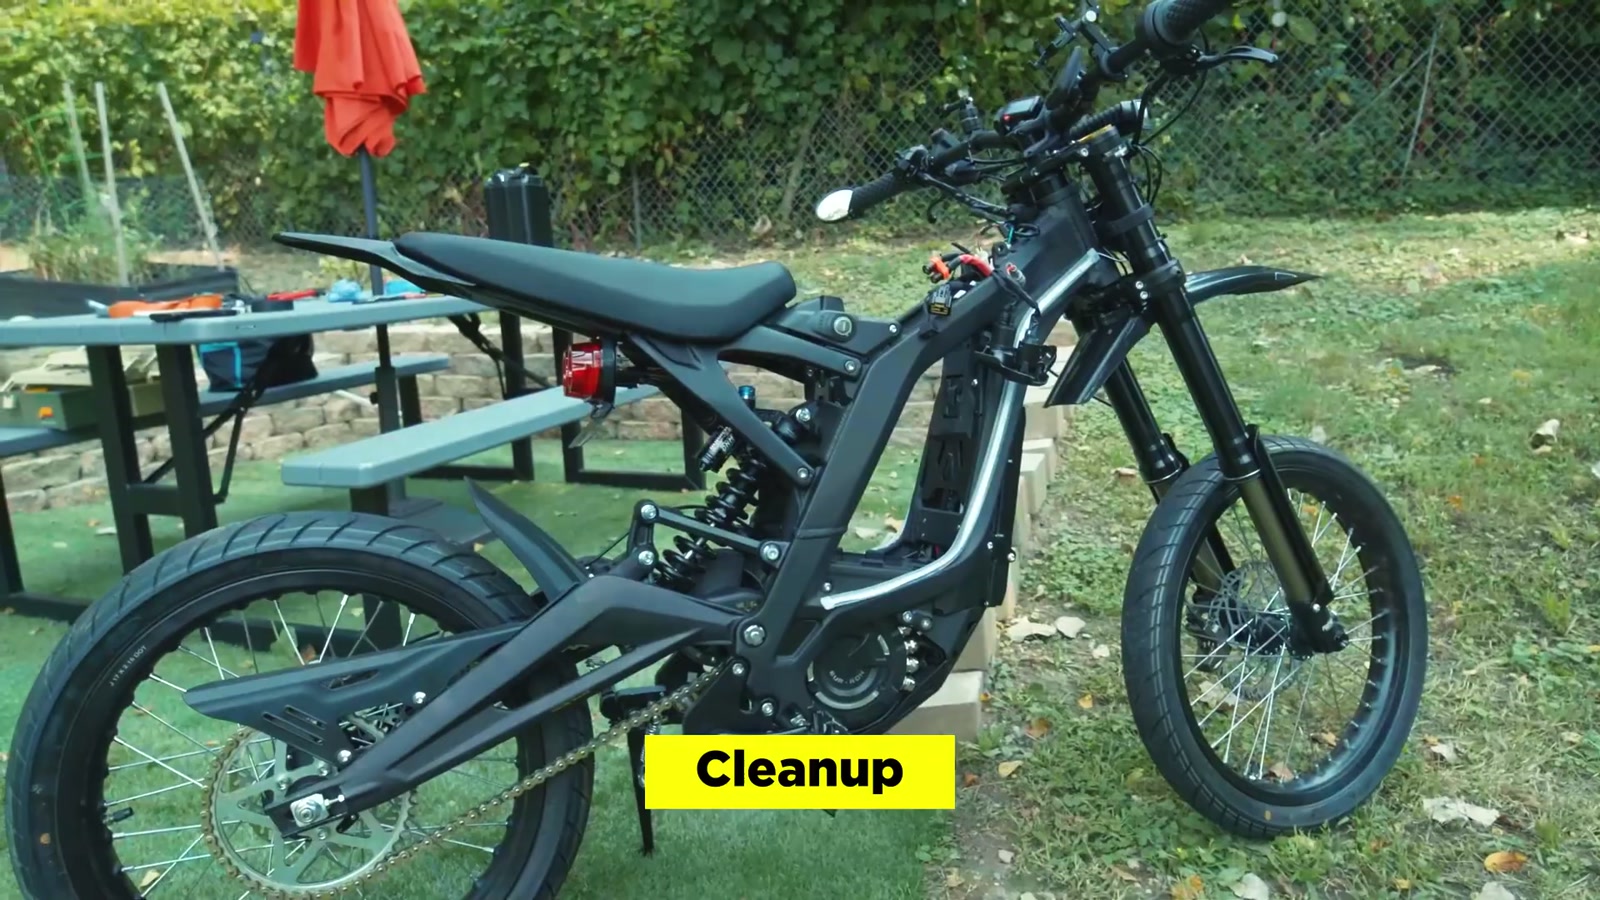
Cable management: making it look factory(ish)
The best lighting in the world still looks bad if the wiring looks like a science project.
Up front, I grouped components (like the flasher relay and the side strip control boxes), taped them into a compact bundle, and secured them with zip ties. I used cloth tape heavily to keep everything from chafing and to reduce visible clutter.
I also used the stock number plate to help hide the front harnessing. That single move cleaned up the whole front end visually.
In the rear, I used crimp connectors so I can disconnect things without desoldering half the bike later. Then I reinforced and strain-relieved everything with tape and zip ties.
How it feels on real rides
The biggest upgrade is confidence
The headlight setup feels more intentional now. Being able to actually control the headlight is huge—there are times I want the bike on without blasting a light, and the kill switch makes that simple.
Turn signals add real-world usability
Hand signals on a Sur-Ron can be awkward depending on your bars, gloves, and traffic. Having proper left/right signaling (with front, side, and rear participation) makes the bike easier to live with if you’re mixing with cars or riding in busy areas.
Rear visibility is noticeably better
Adding the extra LED brake strip under the tail light gave me the “hey, I’m braking” punch I wanted. It’s also reassuring that the running light stays on for visibility.
What We Like
Much better visibility from multiple angles (front/side/rear)
Low-profile fork signals look clean and are less likely to get damaged
Headlight kill switch adds real control the Sur-Ron doesn’t give you stock
Display relocation improves bar layout
Extra brake strip adds rear presence, especially at night
Cloth tape + proper solder/heat shrink makes the harness feel solid and quiet
Things To Consider
You need basic electrical confidence (multimeter use, soldering, clean splicing)
Plan your wire routing before you start cutting/splicing—especially to the tail
The circular tail light mount may require simple fabrication (L-brackets worked for me)
Expect some time spent on cleanup and hiding harnesses if you want a polished look
Final Thoughts
This DIY lighting rig made my Sur-Ron X feel more complete for real-world riding. The biggest win isn’t a spec sheet—it’s the day-to-day experience: clearer signaling, better rear visibility, and a headlight setup that I can actually control.
If you’re willing to take your time with wiring and you care about a clean install, building your own setup like this is a satisfying upgrade. It’s also the kind of mod where the effort pays you back every single ride.