
From Mild to Wild: Installing a 10,000W Sotion Hub Motor on My EGO Mini Bike
June 1, 2024
Some links in this article may be affiliate links. If you buy through them, we may earn a small commission at no extra cost to you.
I’ve been having a blast with the EGO Power+ Mini Bike as a fun, approachable EV that’s easy to live with. But like any good garage EV project, the “what if” starts creeping in.
Read more: Powerful Lithium and EV Raceworks

What if it had real punch?
This is where the 10,000W Sotion hub motor comes in. I sourced the motor setup from Powerful Lithium, paired it with a FarDriver controller, and then got hands-on help to make the physical fitment actually work on the EGO swingarm. From there, I finished the day by getting a proper street tire mounted so the bike is ready for the next stage of tuning and riding.
Below is how the install experience really went, what took the most effort, and what I’d do again (and differently) if you’re considering the same swap.
The goal: keep the EGO vibe, add serious potential
The EGO mini bike is a surprisingly solid little platform. Even before the motor swap, it already feels like a “real” small bike in the way the chassis carries itself.
The point of this build isn’t to turn it into an uncontrollable science experiment. I want it to feel like a stronger, more confident mini motorcycle—not a twitchy mess. That mindset shaped a lot of my choices during wiring and fitment.
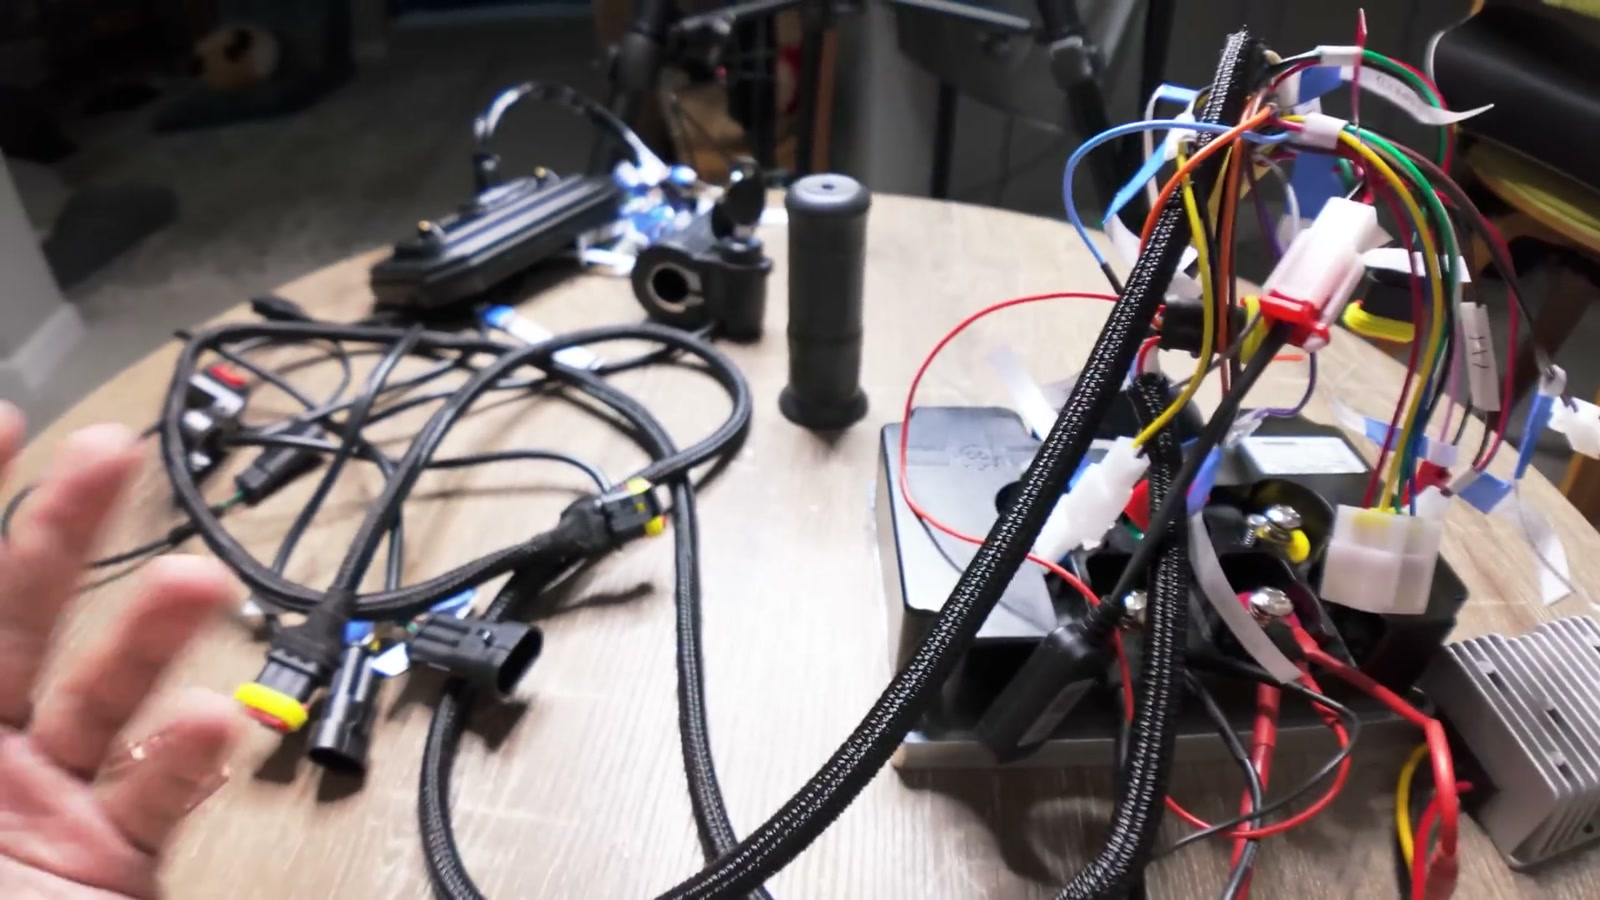
Wiring strategy: organization first, then speed
The FarDriver controller and the Chow G display bring a ton of capability, but I didn’t want to get lost in feature creep.
Before I mounted anything, I labeled wires. That was the single biggest sanity-saver in the whole wiring process. The controller/display harnesses have plenty of leads I’m not using right now (things like extra functions, comms options, and various features that are cool on paper but not required to ride).
Display: use what matters, skip what doesn’t
The Gen 3 Chow display has a lot going on, including features I’m not bothering to wire at the moment (like certain indicator/icon functions). I focused on the essentials so I can get the bike running and iterate later.
To keep the bike serviceable, I added extension wiring and waterproof connectors so the display can connect cleanly from the front of the bike to the controller at the rear without creating a mess.
Throttle + key ignition: simple and practical
I like having a key ignition controlling the system. The way I set it up, turning the key completes the circuit so the controller and display power up together.
I also swapped to my own waterproof connectors here instead of relying on whatever came pre-terminated. It takes more time up front, but it makes the setup feel more “vehicle” and less “prototype.”

3-speed switch: quick access to different personalities
I wired a 3-speed switch so I can have multiple power levels available without digging into settings every time. It’s one of those small quality-of-life upgrades that makes a high-potential build easier to live with.
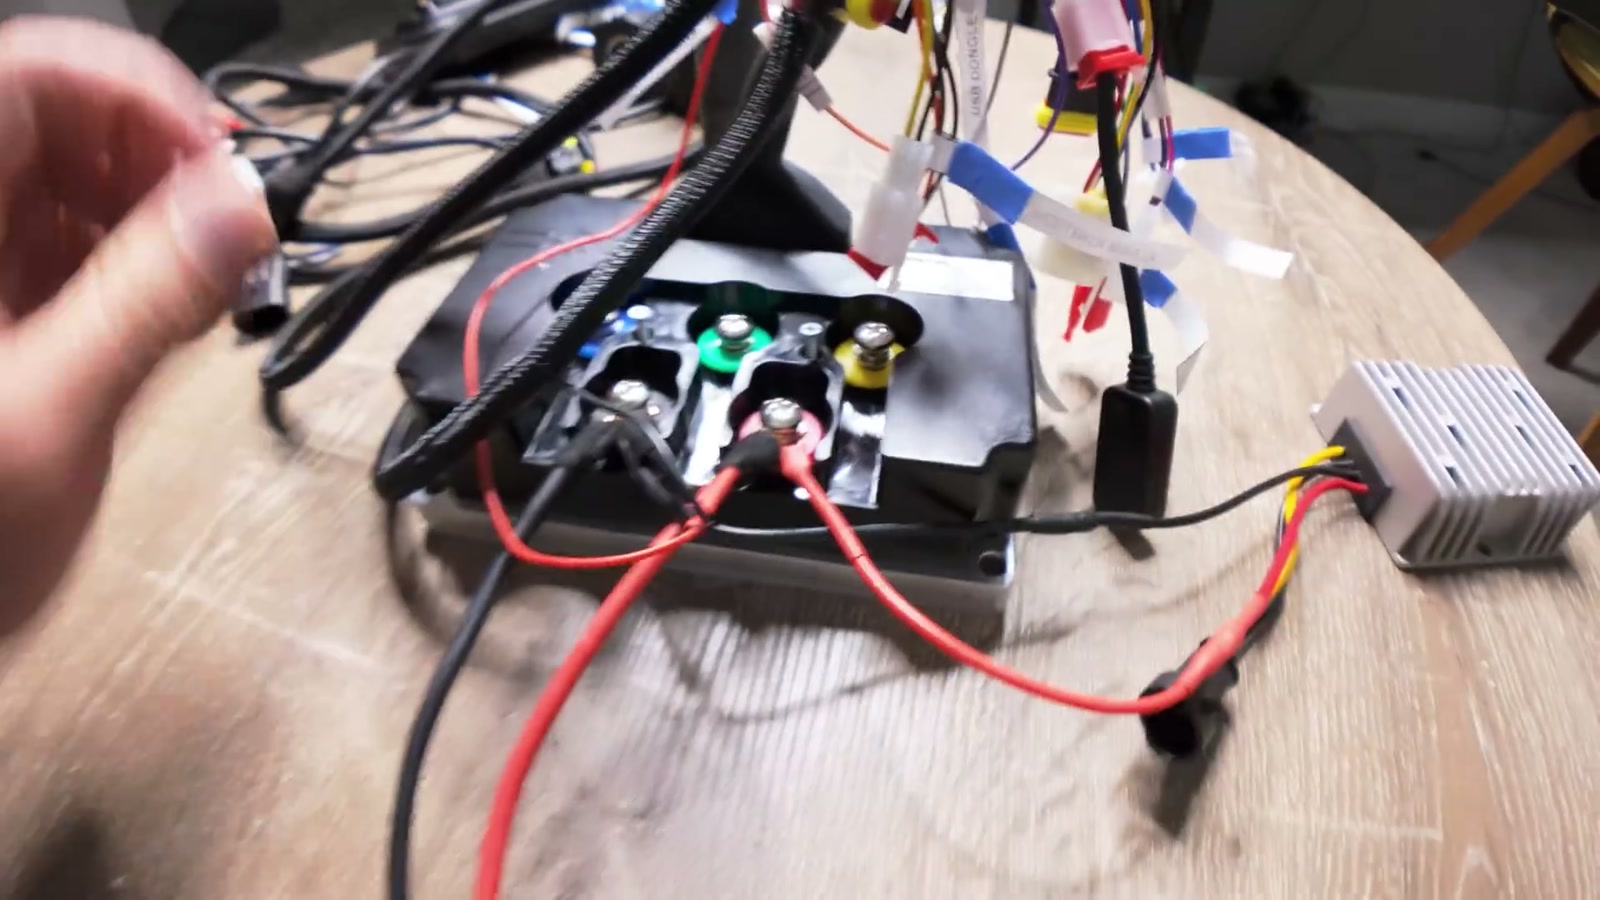
Power connections: crimped, heavy-duty, and clean
For the main power connection, I used a QS8 connector and ring terminals. I crimped instead of soldering for the heavy-gauge work.
I also added a separate 12V step-down for my accessory/lights setup so I could keep that part of the bike consistent with the rest of my build approach.
A key takeaway here: this is not a plug-and-play swap. If you’re considering it, basic ebike electrical knowledge is table stakes, and you’ll be happiest if you enjoy the process of learning and troubleshooting.
Stripping the bike: a blank canvas moment
Once the EGO was gutted, it honestly felt like the best kind of EV project: a bare frame ready for whatever you want to turn it into.
I test-fit the FarDriver controller and built a simple base plate to mount components where the original battery enclosure lived. I also made sure to add foam isolation anywhere a battery or component might rub against the frame. It’s not glamorous work, but it’s the kind of detail that keeps projects from failing later.
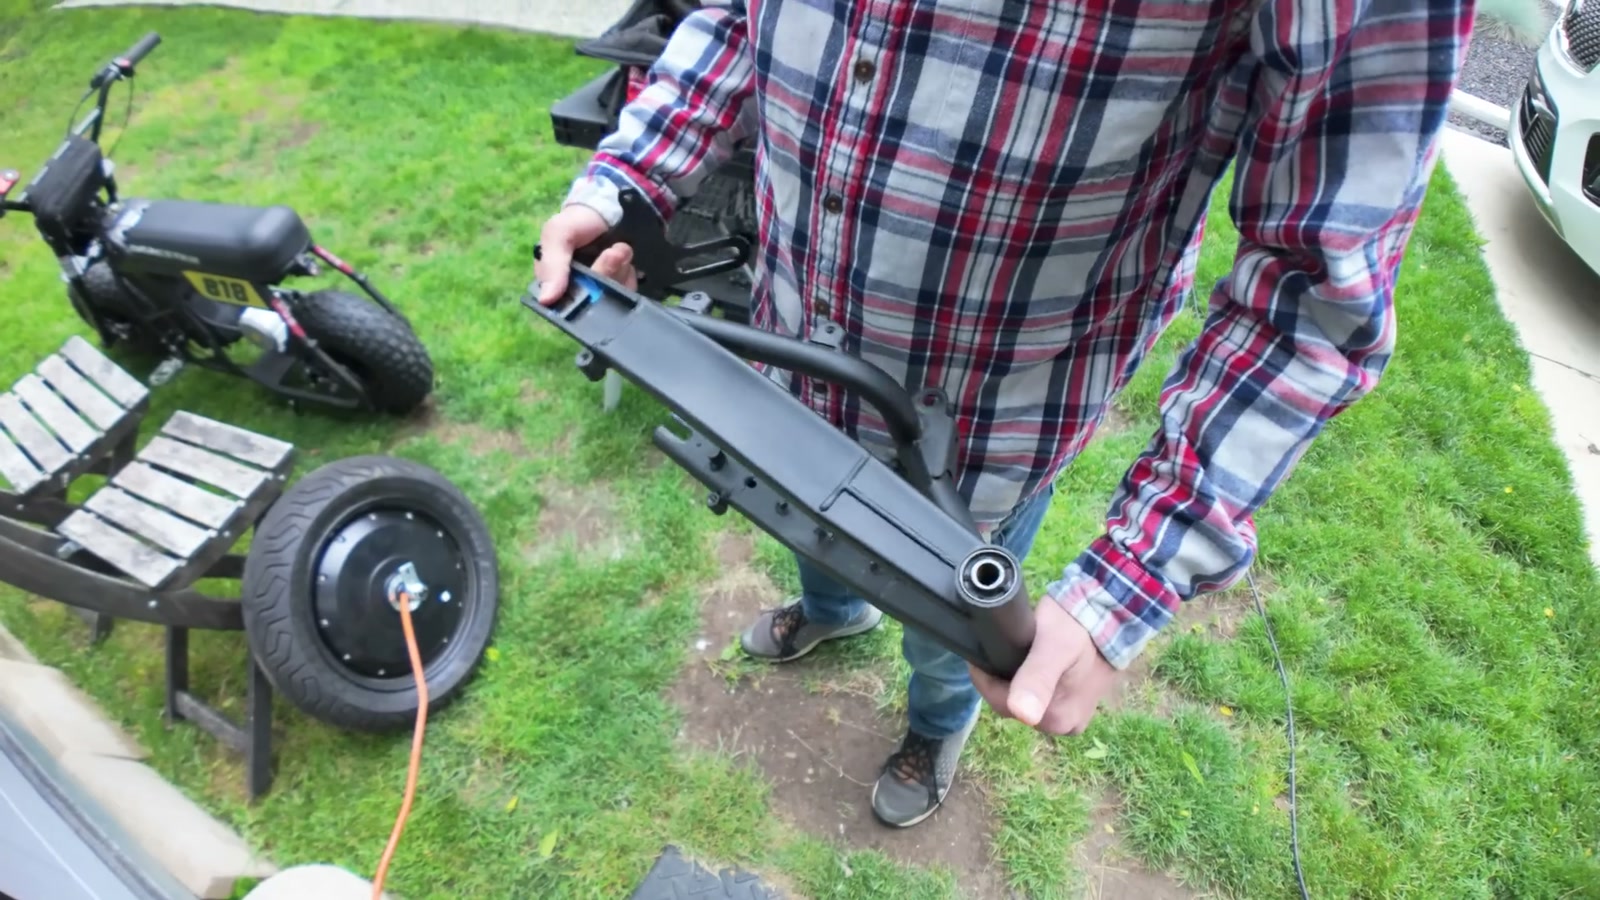
The real fight: fitting the Sotion axle into the EGO swingarm
The Sotion hub motor is a beast compared to the stock unit. You feel it immediately in your hands—this thing is dense and heavy, and the wiring and axle hardware all scale up accordingly.
The problem
The Sotion axle is larger than the stock EGO motor axle.
That means the EGO swingarm dropouts needed to be widened to accept the new motor.
The fix
With help from EV Raceworks, I removed material from the dropouts to widen them to fit the Sotion axle. The approach we used was careful and measured—digital calipers were the MVP here.
Once the motor could physically sit in the swingarm correctly, the rest became a spacing and alignment puzzle.
Brake hardware: it fits, but it’s not “done” instantly
The stock EGO brake rotor fit directly onto the Sotion motor, which was a huge win.
But getting the brake caliper bracket and anti-rotation pin happy took trial and error. We had to:
Shorten the brake bracket pin because it was contacting the rotor
Open up a bracket hole to clear the larger shoulder on the new motor
Plan for washers/spacers to close gaps and keep everything properly seated and stable
This is the part of the build where you don’t want to rush. If the motor isn’t seated correctly, if the bracket spacing is off, or if the axle hardware isn’t right, the rest of the system doesn’t matter.
Street tire time: Michelin mounted on the new hub
After the motor fitment work, I took the wheel over to Detroit Moped Works to get the street tire mounted.
A bigger hub means a different feel when mounting, and it’s immediately obvious how much more volume and “bulge” the Sotion hub occupies compared to the stock wheel.
Valve stem swap
One small detail that ended up being a real moment: moving the valve stem.
With hot soapy water and a careful approach, we were able to extract it and reuse it without damage.
Seating the tire
The tire fought like a proper tire should, but with two people and multiple tire irons it went on. We inflated it up to help it seat, listened for it popping into place, and then brought pressure back down after seating.
We also verified rotation direction so the tread orientation matched the intended rear mounting direction.
How I expect it to ride (and what I’m aiming for)
A 10,000W-rated hub motor comes with real potential, and I’m not pretending that means you should just send full power on day one.
My goal is smooth tuning and predictable delivery so the bike stays confidence-inspiring. The EGO chassis already felt safe and solid to me in stock form, and that gives me hope that—set up correctly—this upgraded drive system can feel like a strong, stable little machine instead of a sketchy rocket.
What We Like
The EGO mini bike platform feels sturdier than you’d expect, which is exactly what you want before adding serious power potential
Labeling wires and using waterproof connectors made the wiring feel manageable and serviceable
The stock EGO brake rotor fitting the Sotion motor was a big compatibility win
Once the dropouts were widened, the rest of the alignment process became a solvable spacing problem instead of a hard stop
A real street tire on the new hub helps this build stay grounded in “ride it often” practicality
Things To Consider
This is not a plug-and-play mod; you need comfort with ebike electrical systems and time for troubleshooting
Swingarm dropout modification is required for this fitment (measure carefully and remove material intentionally)
Brake bracket spacing and anti-rotation hardware may require grinding, opening holes, and dialing in washers/spacers
The motor is physically heavy; plan your mounting and handling accordingly
It’s smart to build with a “tune for smoothness first” mindset—raw power is easy, rideability is the real win
Final Thoughts
This swap took the EGO mini bike from “fun little EV” into something with legitimately wild potential.
The most important lesson for me was that the hardest part isn’t buying parts—it’s making everything fit correctly, align correctly, and connect cleanly so the bike can be worked on later without becoming a wiring nightmare.
If you’re willing to measure twice, grind once, and stay organized, the Sotion + FarDriver path looks like a very real way to level up the EGO platform while still keeping it practical enough to ride like a small, confident street machine.