
My First Onyx RCR Mods: Lighting, Controls, Comfort, and Clean Cosmetic Tweaks
May 31, 2021
Some links in this article may be affiliate links. If you buy through them, we may earn a small commission at no extra cost to you.
If you’re new to the Onyx RCR world, the fastest way to make the bike feel more “yours” isn’t some huge performance overhaul—it’s dialing in visibility, controls, and comfort.

That’s exactly where I started. I wanted to feel safer in traffic (especially at night), clean up a few usability quirks, and give the bike a more intentional look without turning it into a science project.
Here are the first mods I installed on my Onyx RCR, what it was like living with them, and what I’d do again.
The first priority: lights that actually communicate
The RCR has presence, but in real traffic I care less about presence and more about clarity. When I’m riding downtown, doing the classic bicycle arm signal can throw my balance off because the bike is heavy. The solution for me was simple: real turn signals, brighter lighting, and more side visibility.
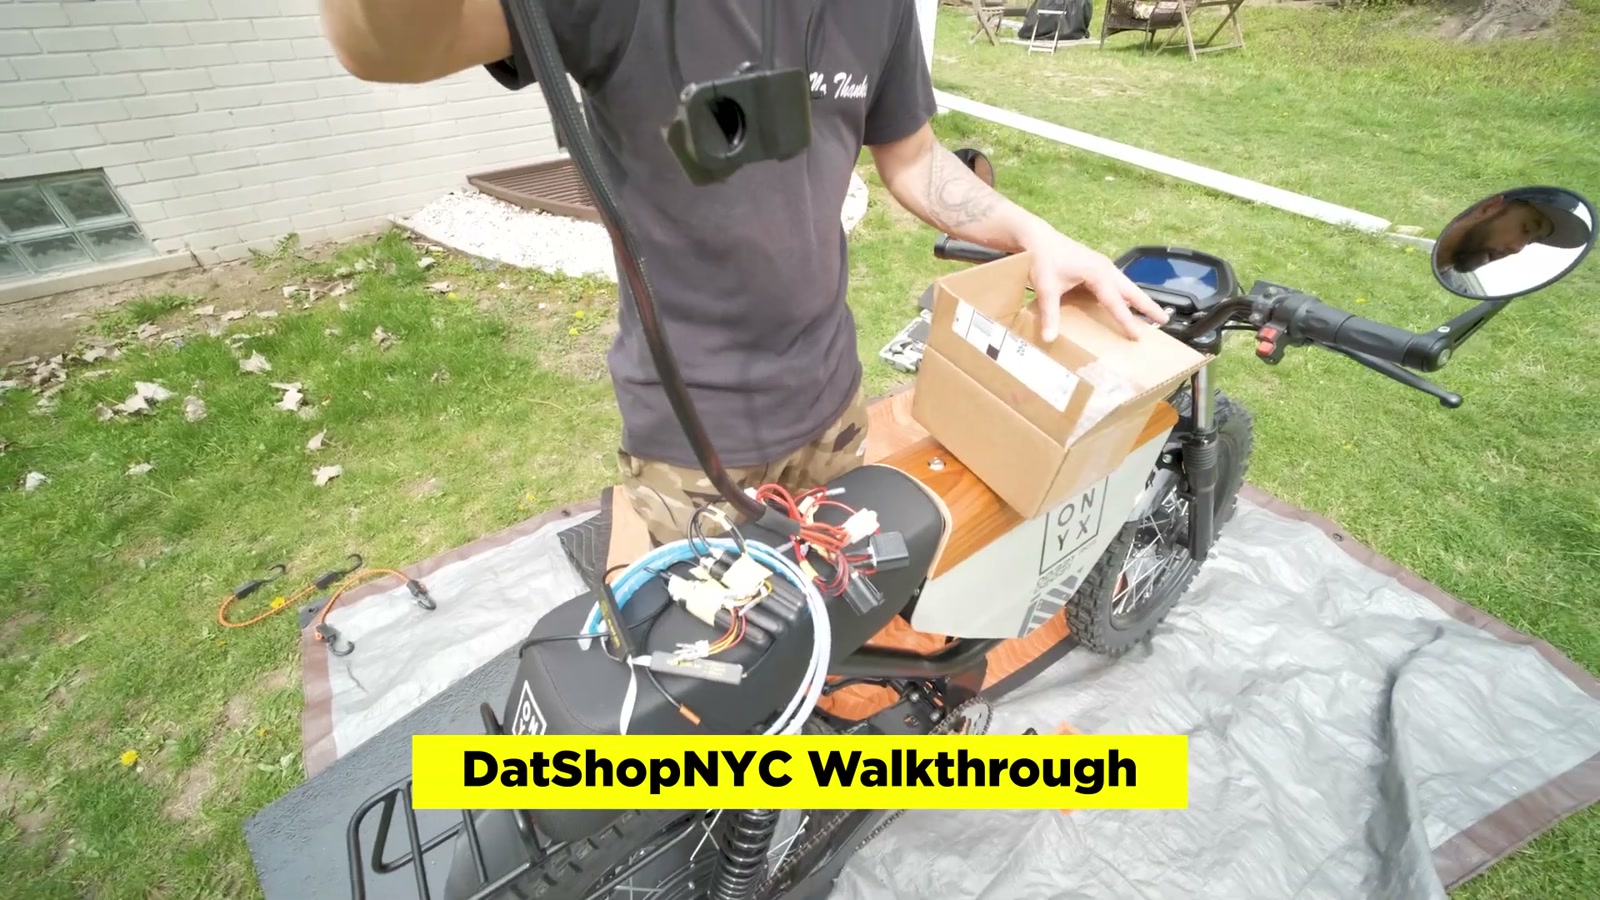
DatShopNYC lighting kit + harness (the “why didn’t this ship like this?” mod)
This setup was the foundation for most of my lighting upgrades. The big win wasn’t just adding signals—it was the way the system makes the bike more readable from more angles.
The side panel LEDs were a standout. When I signal, the whole side panel lights up, which looks great at night but, more importantly, gives drivers and riders next to me a clear cue that I’m turning.
The harness also made it easier to integrate additional lights without me having to reinvent the wheel with custom splicing. For me, that mattered. I can solder and splice, but I’d rather spend that time riding.
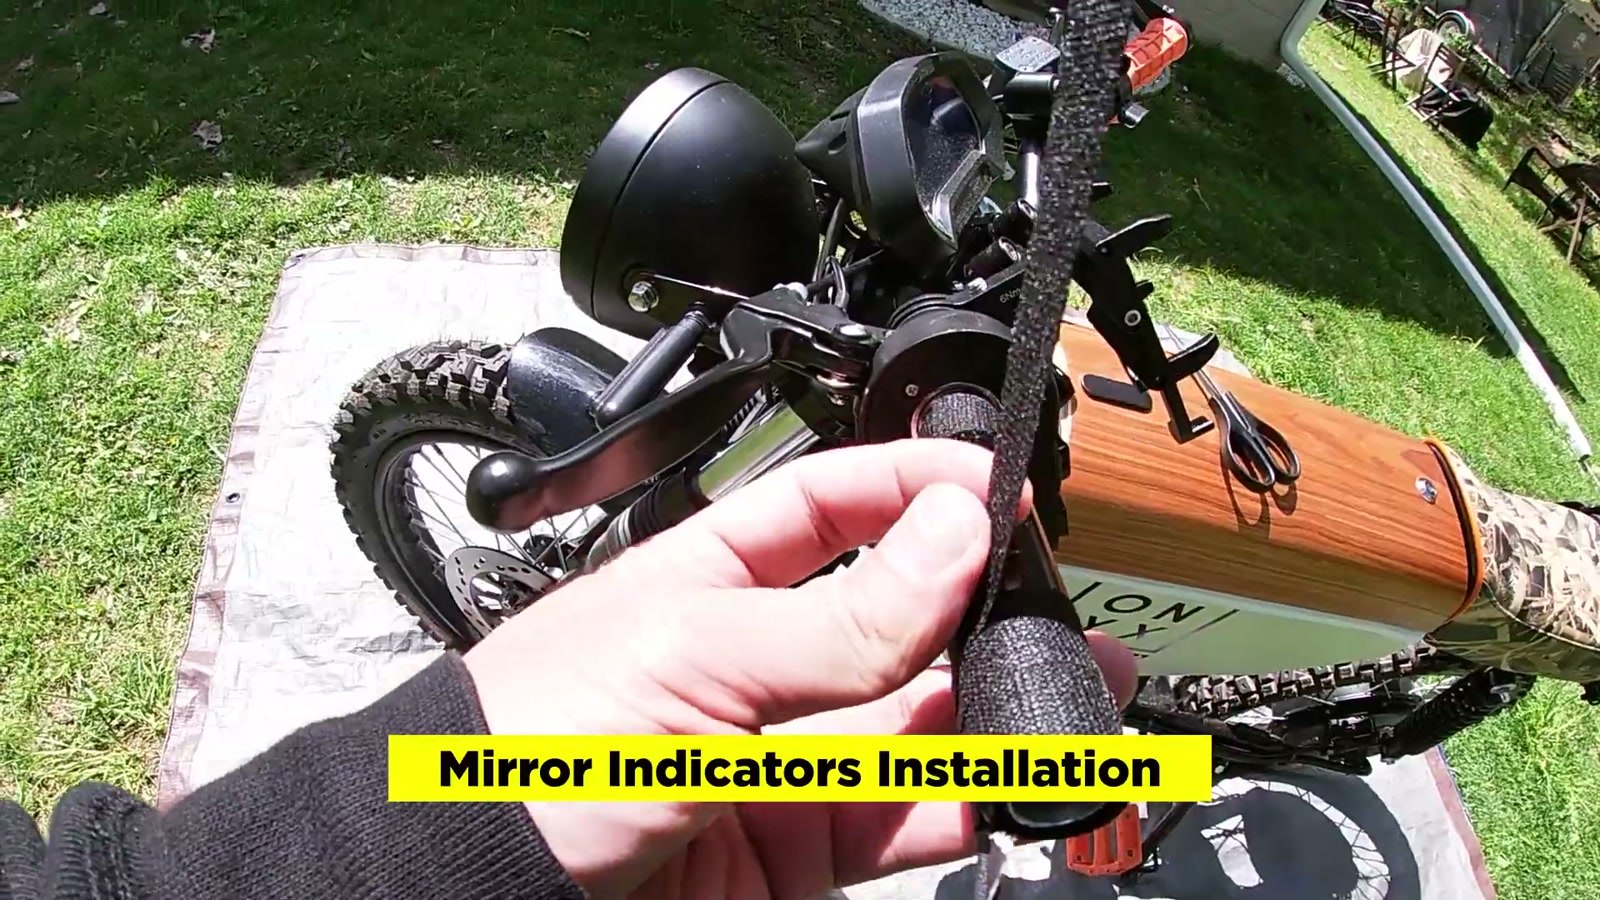
Mirror-mounted turn signals (visibility up high)
Once I had the harness in place, I tapped into it and added additional turning lights on my mirrors. The benefit is immediate: signals higher up on the bike are easier for cars to see when you’re surrounded by traffic.
Routing the wiring was clean, too. I ran wires underneath the grips, wrapped the cable along the bar, then slid the grips over it. From a riding perspective, I can’t feel it because it sits on the underside.
A headlight upgrade that changes night riding
5.75" Wisamic halo LED projector headlight + housing + grille
I swapped the stock headlight for a 5.75" halo LED projector unit, and the difference in brightness and presence was obvious right away. The bike looks more “finished” from the front, and I feel more confident when street lighting is inconsistent.
A couple real-world notes from the install:
I used an H4 headlight harness to make the connection work.
With the aftermarket brackets, I had to mount the light higher on the fork so it wouldn’t knock into the wood panel when turning.
The grille was purely aesthetic, but it completed the look. The combo of the larger light, black brackets, and grille made the whole front end feel cleaner.
Fixing a weird RCR quirk: DIY “bump stops”
One of the more frustrating issues I ran into is that the RCR doesn’t have bump stops, so when you turn the fork, it can bump into and damage the wood cover.
My quick fix: heavy-duty furniture sliding pads.
I stuck them on the front so they act like bump stops and protect the wood. It’s not glamorous, but it’s the kind of mod that saves you from slowly beating up your own bike over time.
Rear lighting that does more than just glow
Flexible LED tail light with brake + amber turn signals
I love this style of flexible tail light because it’s bright and readable. On the RCR, I wired it so I could use the full feature set:
It functions as a tail light
It gets brighter under braking (connected to the sensors)
It includes built-in amber turn signals for left and right
I mounted it cleanly by modifying the stock fender and adding a carbon fiber rod so the flexible strip had a solid mounting point. The end result looked tidy and felt like a real upgrade—not just an accessory stuck on the back.
And because the harness includes a splitter, there’s room to expand later if I want even more rear lighting. For now, I actually like keeping it simple.
Comfort and control: the stuff you feel every single ride
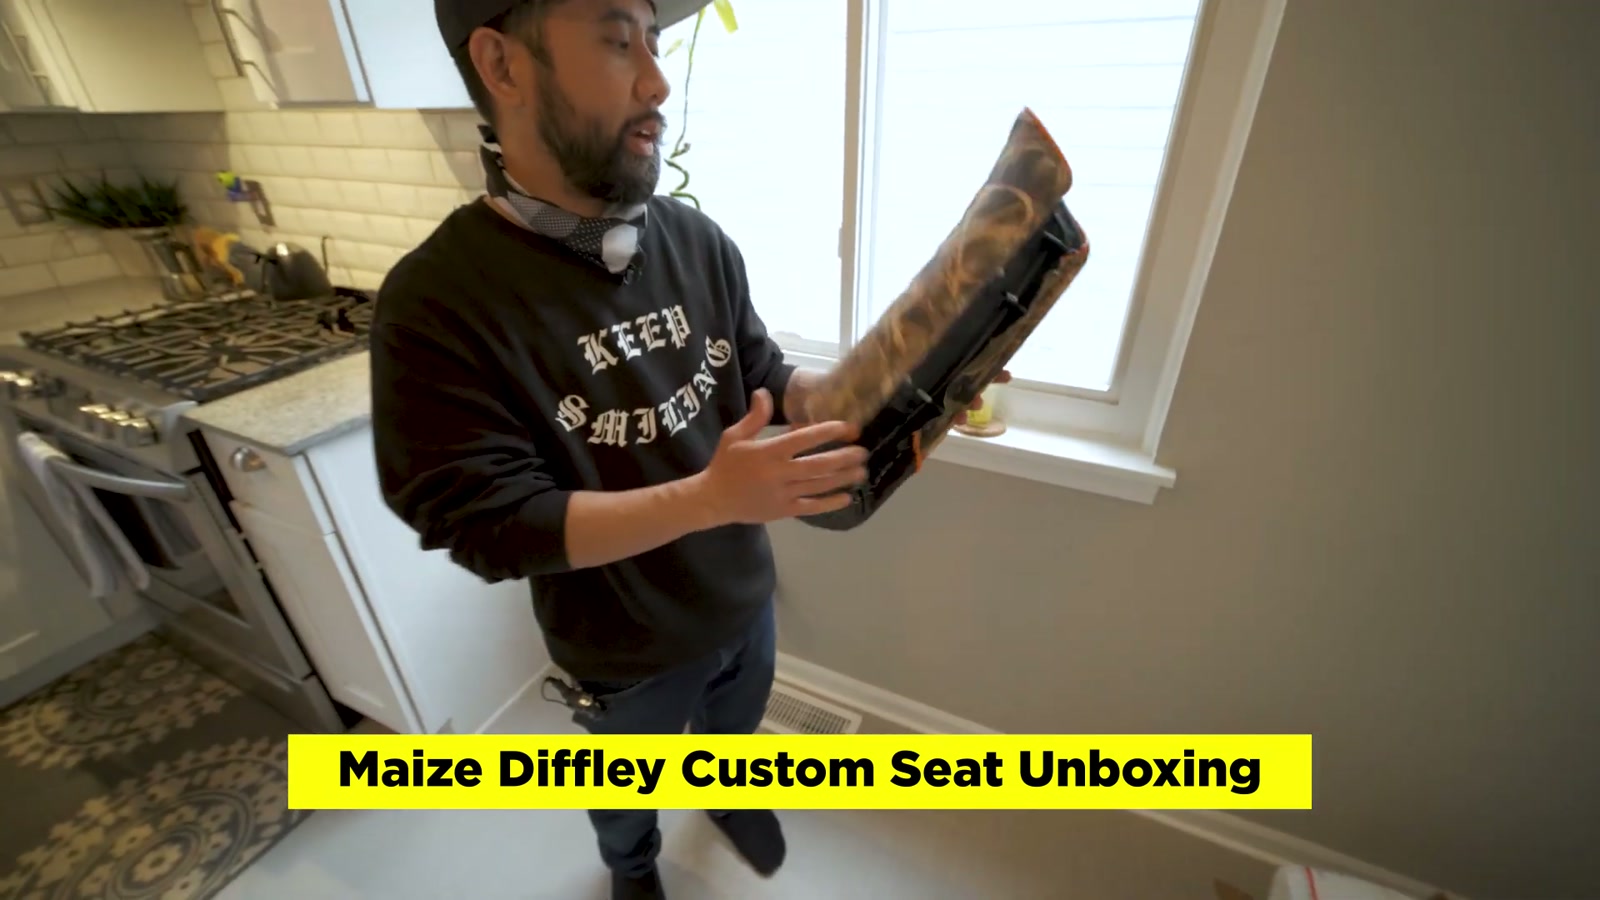
Maize Diffley custom seat (CornPed)
This is the mod I appreciated the most the moment I sat down.
I had Maize build a custom café racer style seat with Realtree camo on top, horizontal stitching, hazard orange piping, and a black colorway. The craftsmanship looks premium, and the materials are meant for upholstery use (the kind of stuff that’s built to handle weather and wear).
The shape matters as much as the look. There’s a dip in the seat that brought my seating position slightly lower (I’m on an Onyx shorty), which gave me more stability at stops. While riding, it helps me lock in with my hips and thighs, and that makes the bike feel easier to manage.
Krator handlebar + bar-end mirrors (with a little extra work)
I swapped the stock bar for an aluminum moto handlebar. It changed the feel of the cockpit and also gave the bike a slightly different stance.
One install gotcha: the bar thickness meant my bar-end mirrors didn’t fit without drilling out the inside of the handlebar so the expanding insert could seat properly.
Once installed, I loved the cleaner look—and it paired nicely with the mirror-mounted turn signals.
Domino throttle harness… and my thumb throttle hot take
I installed a Domino throttle harness that converts the mode switch behavior (sport/normal/economy) and changes the kill switch setup. The big value is plug-and-play compatibility for the Domino throttle without needing to splice wires.
Here’s my personal take after riding it: I wasn’t into the full twist throttle.
I’m not coming from motorcycles, and I couldn’t get the control I wanted with the twist style—especially when I’m balancing three things at once: throttle modulation, braking, and turning. On harder leans through curves, I felt more in control with a thumb throttle.
I know that’s going to be controversial in some circles, but for my riding style, the thumb throttle just makes the bike easier to ride smoothly.
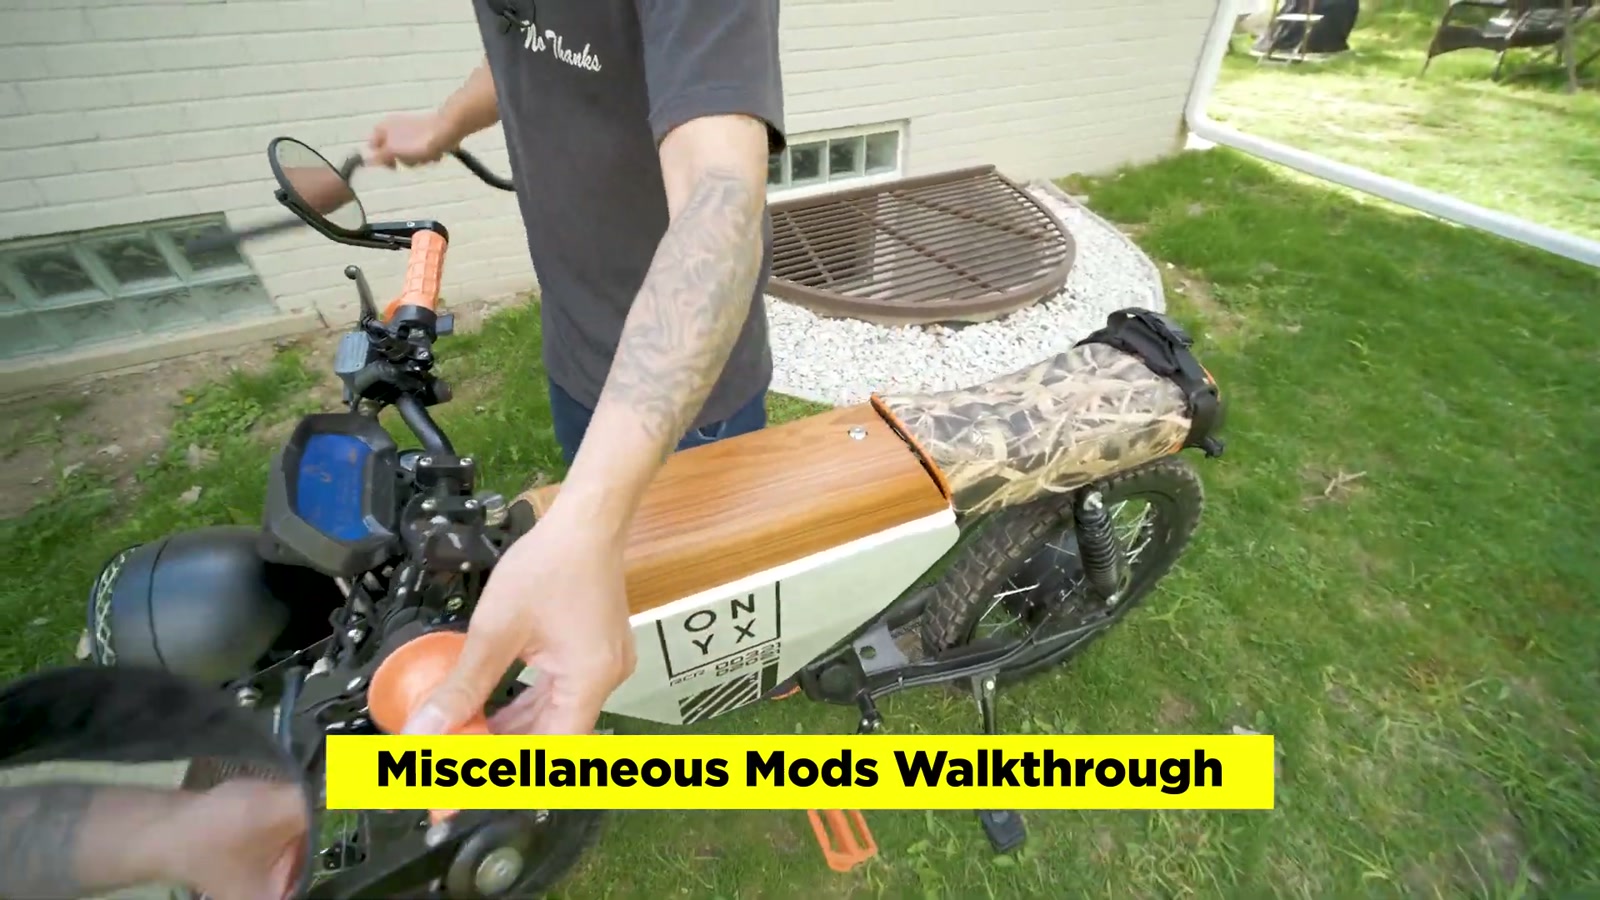
Small cosmetic tweaks that still feel worth it
David Shaw magnetic front fender
This is one of those simple ideas that’s just satisfying. The fender uses magnets underneath and attaches to the metal fork stabilizer. It’s clean, it works, and it doesn’t feel overcomplicated.
Vinyl lettering (DIY Lettering)
I added an Onyx logo using premium outdoor vinyl. If you take your time with measuring and use a heat gun on a low setting, you can get a really clean result that looks factory.
BMX pedals for the orange accent
This one was purely for the vibe. The pedals are a little bigger than stock and tied in the orange accent I wanted. The stock pedals were fine—I just wanted a different look.
What We Like
The DatShopNYC harness approach makes lighting upgrades feel achievable, not intimidating
Side panel lighting during signaling is both functional and genuinely cool at night
Mirror-mounted signals sit higher and are easier for traffic to see
The 5.75" headlight upgrade noticeably improves nighttime confidence
The flexible tail light setup adds brake and turn functionality in a clean package
The custom seat improves stability and the overall feel of the bike immediately
Simple “bump stop” pads prevent slow, annoying damage to the wood panel
Things To Consider
Aftermarket headlight brackets may require repositioning to avoid contact with the wood panel
Bar-end mirrors on thicker aluminum handlebars may require drilling for proper fit
The Domino twist throttle isn’t automatically “better” for everyone—control preference depends on your background and riding style
Some of these lighting installs involve small wiring and connectors, so patience (and the right tools) matters
Final Thoughts
My favorite first-round Onyx RCR mods weren’t about making it faster—they were about making it clearer, safer, and more comfortable in the places I actually ride.
If you’re deciding where to start, I’d prioritize turn signals and a lighting harness first, then a brighter headlight, then comfort (seat and cockpit). After that, the fun cosmetic stuff lands better because the bike already feels dialed.
And yes, I’m keeping the thumb throttle.