
EGO Mini Bike Boost: Dialing in a FarDriver Tune with E-Conic Cycles
June 2, 2024
Some links in this article may be affiliate links. If you buy through them, we may earn a small commission at no extra cost to you.
The EGO Mini Bike has been one of those platforms that’s deceptively simple until you start pushing it. Once I got the motor running on my build, the next step wasn’t more parts—it was making the controller behave.
Read more: E-Conic Cycles and EGO Power+ Mini Bike
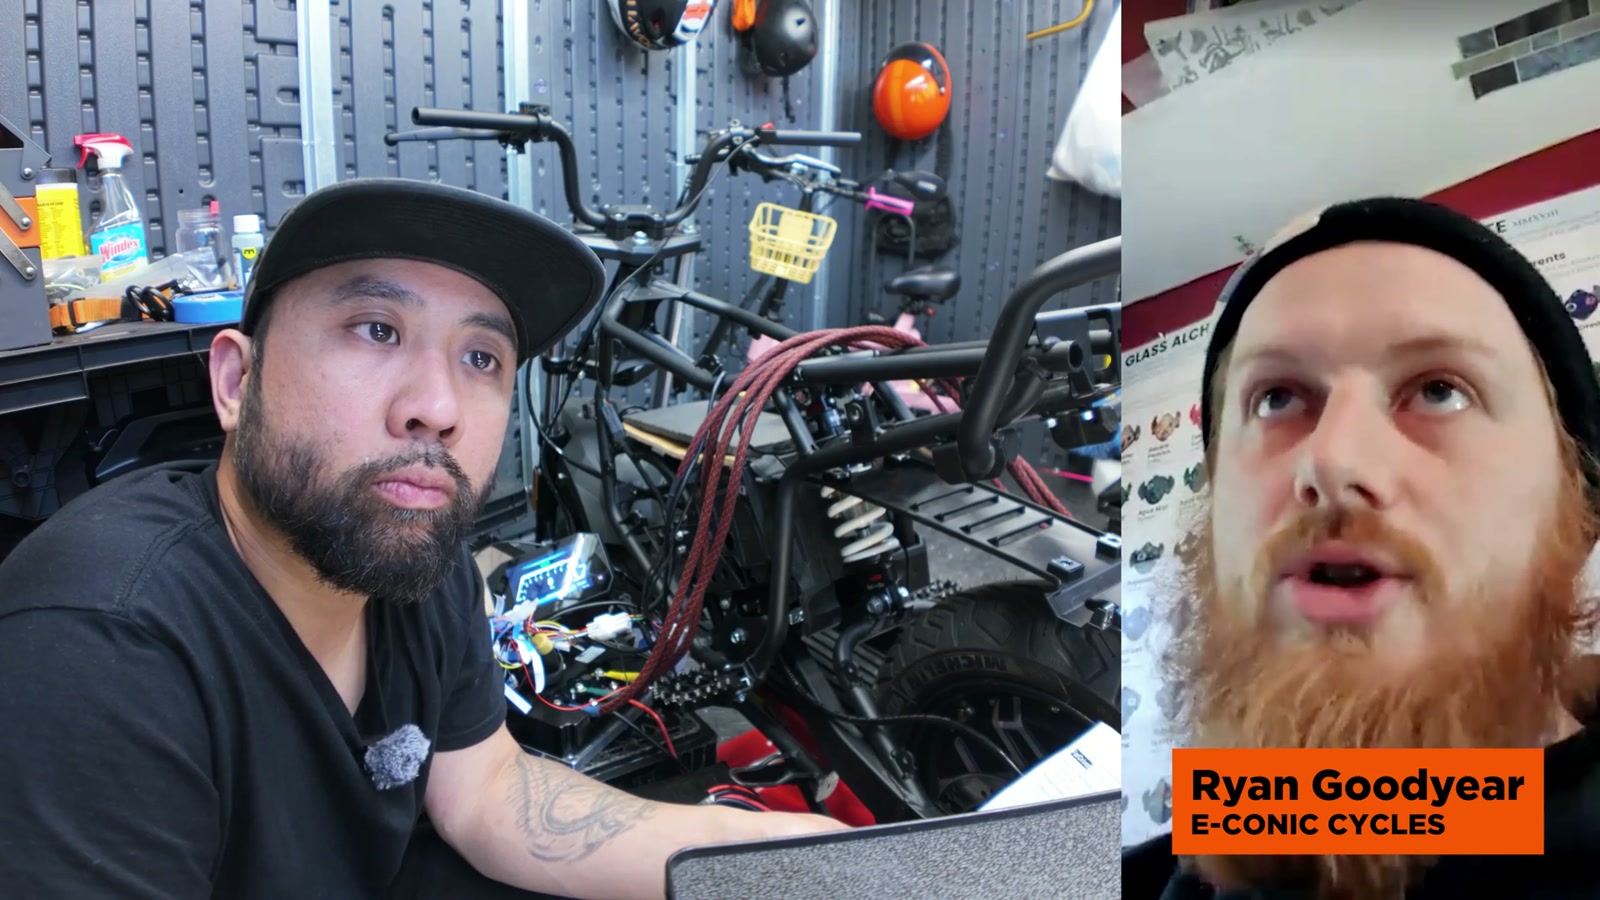
I’m running a FarDriver controller, and tuning it is where the bike goes from “it works” to “it rips (and it’s predictable).” I linked up with Ryan Goodyear from E-Conic Cycles to get my tune in a good place, and I’m glad I did—because I hit a couple snags that would’ve been pure time-sinks without some guidance.
Getting Connected (and Why the Bluetooth Dongle Matters)
The very first hurdle was basic: connecting reliably.
The Bluetooth dongle I originally bought off eBay was a dud. It happens more than you’d think—these dongles are fragile, and a small percentage just don’t work right out of the box. I swapped to a new dongle and immediately got stable connection.
If you’re troubleshooting a FarDriver that “won’t connect,” don’t automatically assume the controller is dead or the app is broken. In my case, a different dongle solved it.
The Throttle Problem That Stopped Everything
Once I could connect, I ran straight into a throttle error that prevented me from doing auto-learn.
I had installed one of those generic throttle + key ignition combos. It seemed like an easy shortcut, but it didn’t play nicely with my setup. The FarDriver app flagged it right away, which I actually appreciate—less guessing, more fixing.
What I took away is this: throttle choice isn’t just preference; it’s compatibility and safety.
Throttle Voltage: Where “Smooth” Starts
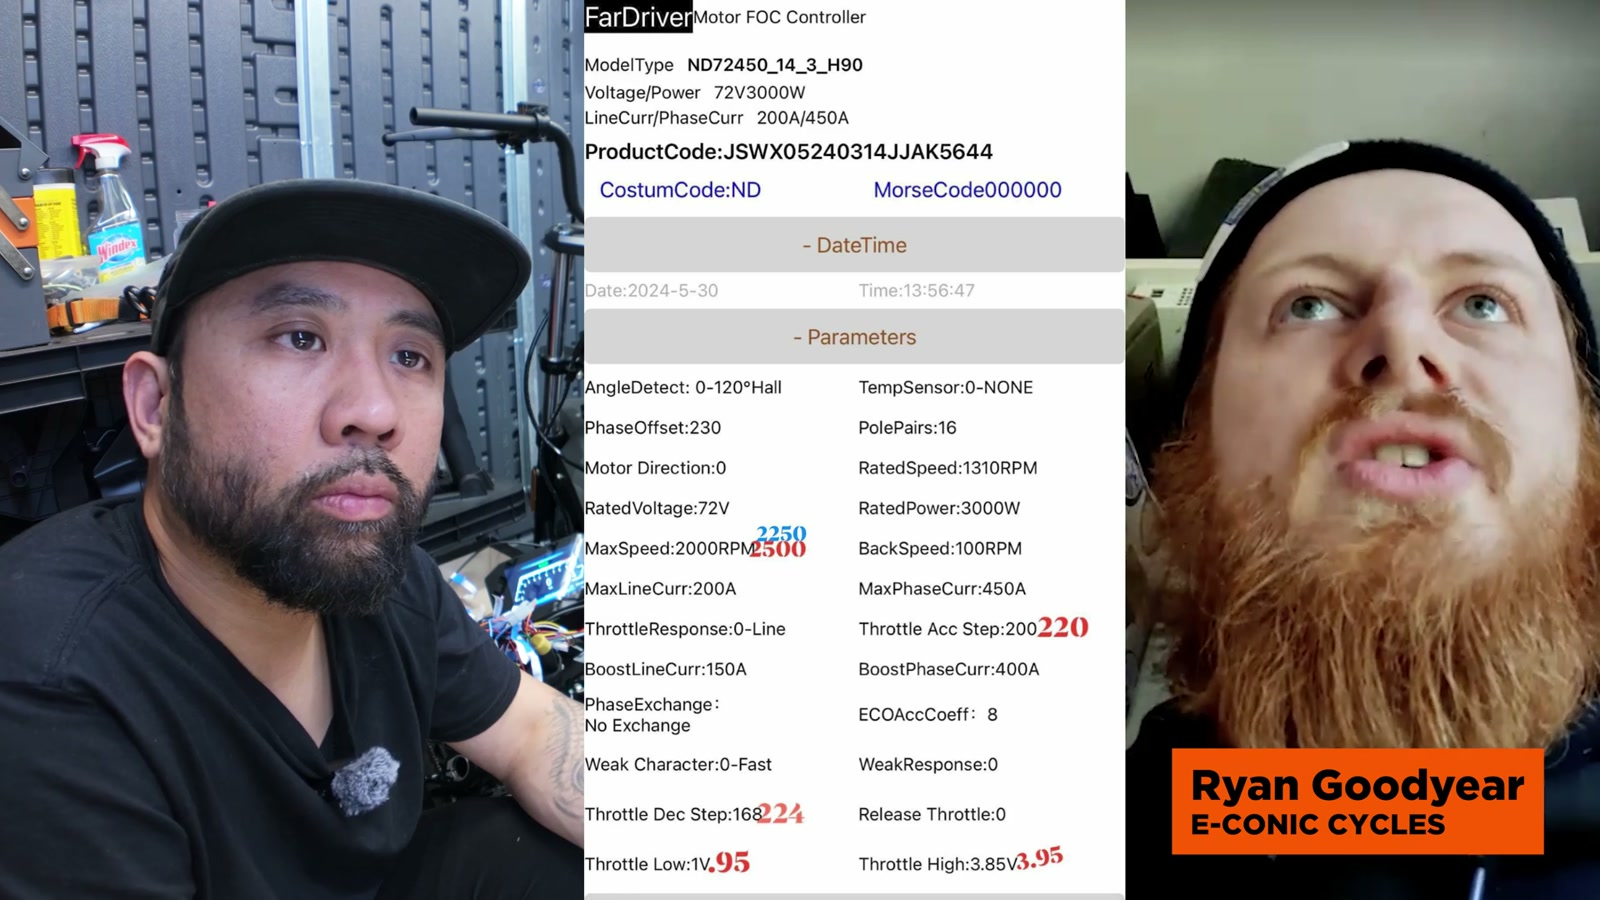
One of the most helpful parts of the tuning process was understanding how FarDriver interprets throttle voltage.
Every throttle has:
A resting voltage (what it outputs at zero throttle)
A peak voltage (what it outputs at full throttle)
In the FarDriver app, I could see the resting voltage in the data/graph area. Then, in the controller parameters, I set the throttle start point slightly above that resting value.
The practical result:
Set too close to resting voltage and the bike reacts to the tiniest touch (fun, but sketchy)
Set too high and you introduce dead space before the bike responds
For my EGO mini bike, I leaned toward safer and more controllable—especially since I’m still finalizing which throttle I want long-term.
Advanced Parameters That Actually Changed How It Feels
There are a lot of FarDriver settings that look intimidating, but a few of them have a real impact on ride feel.
Throttle Acceleration vs Deceleration Step
This is where throttle “character” comes from.
I set the deceleration step slightly higher than the acceleration step. The goal is simple: when I roll off the throttle, I want the bike to respond cleanly and predictably. The roll-off matters more than the roll-on.
On the bench, that change alone made the throttle feel more direct and less mushy.
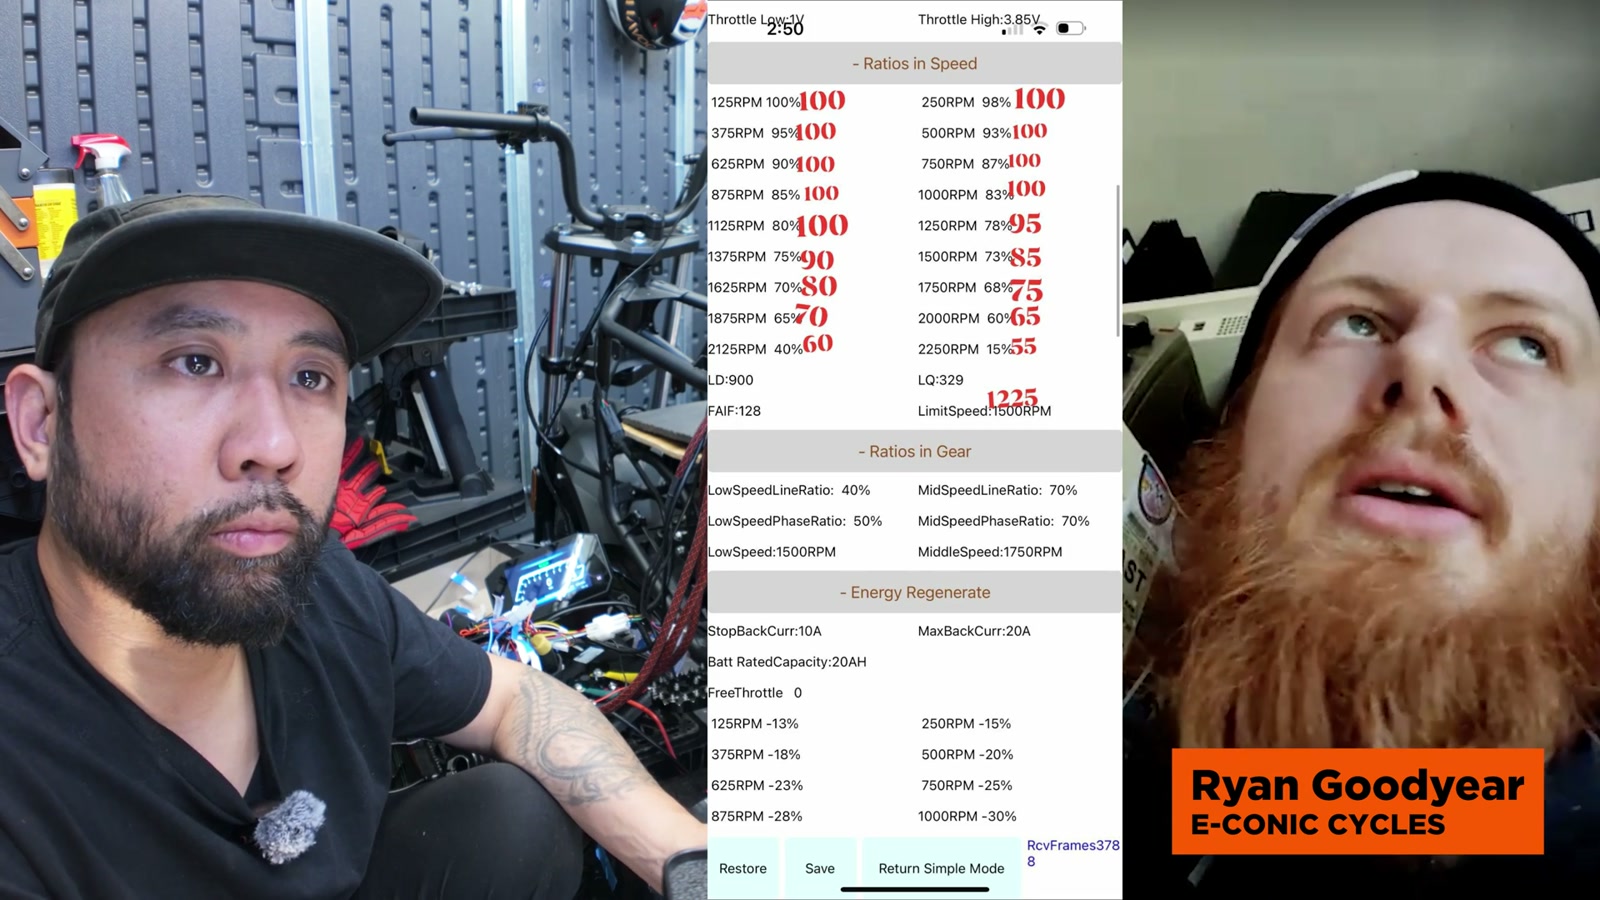
Ratios and Speed: Field Weakening Without Making It Unrideable
This is one of the biggest “secret sauces” in FarDriver tuning: ratios and speed settings that control field weakening.
The way I think about it after dialing it in:
Lower RPM range: normal operation (more efficient, less heat, less chaos)
Higher RPM range: field weakening starts adding speed potential
Field weakening is basically the controller trading efficiency for speed by changing how it drives the motor. It’s not free power; it’s more demand. But when it’s staged properly, it doesn’t ruin the bike’s manners.
For my build, the point was to keep the bike tame in the low and mid range, then let it stretch its legs once it’s already moving.
Regen Setup: The Kind You Actually Use
I’m a fan of regen when it feels natural.
Instead of relying on brake sensors, I configured regen as off-throttle behavior (the “eABS” style option in simple settings). That way, when I fully let off the throttle, the bike gently slows.
Two key adjustments made it usable day-to-day:
A proper start point so regen doesn’t fight me when I’m barely on the throttle
Zeroing out the low-RPM regen behavior so it doesn’t awkwardly grab at parking-lot speeds
The result is a bike that rolls naturally at low speed but gives me that satisfying “engine braking” feel when I’m moving.
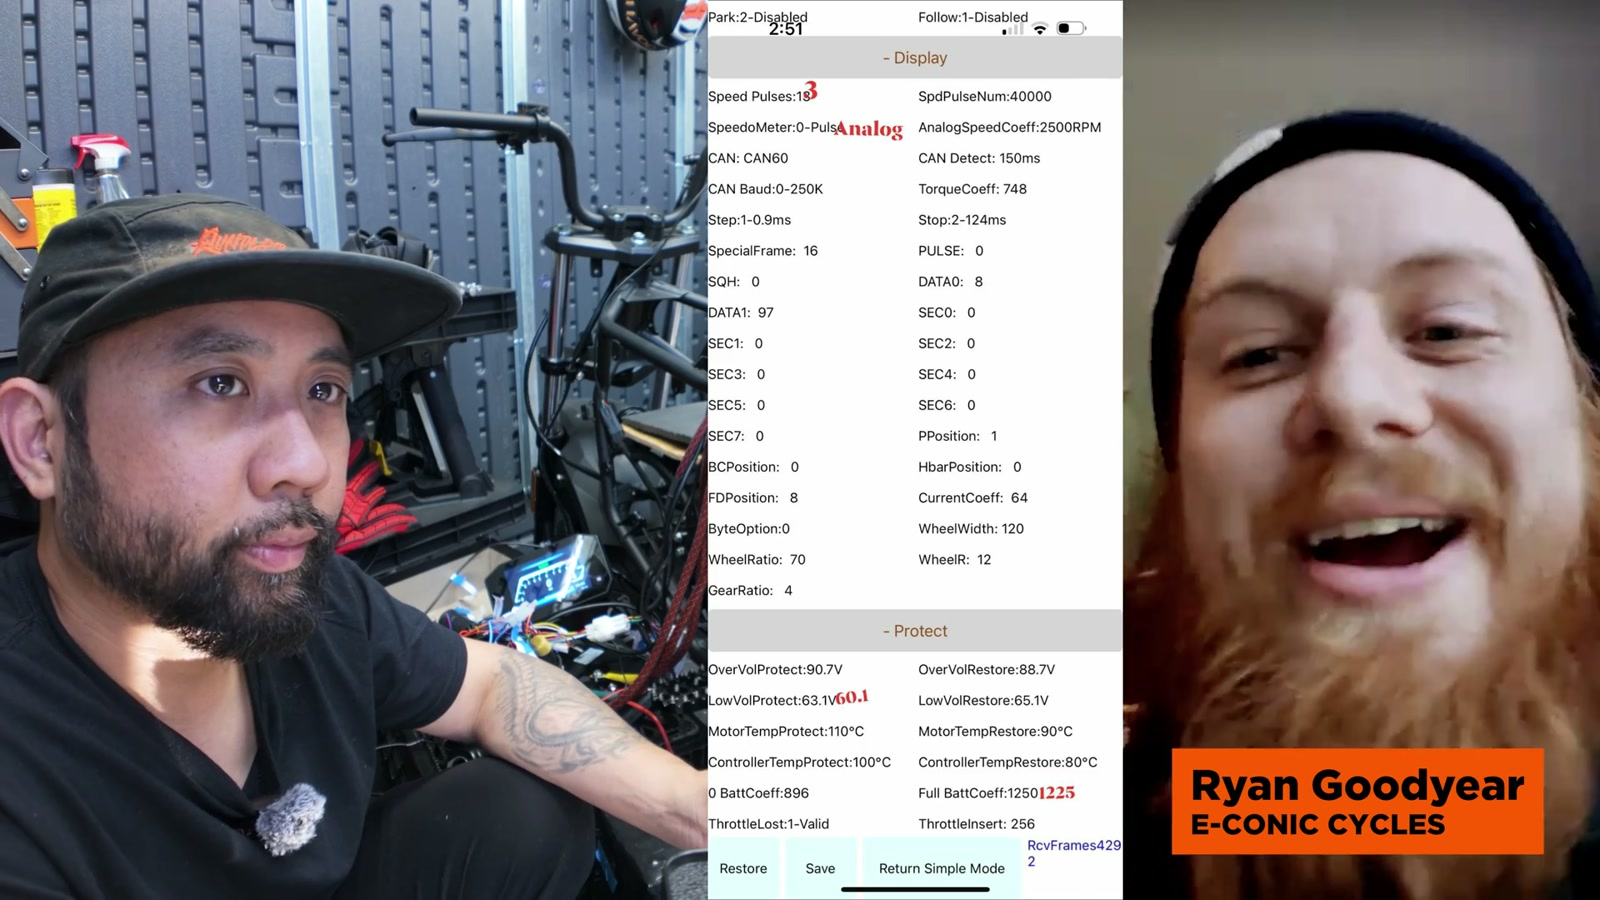
Getting the Display to Read Speed Correctly
When I first hooked up the display, the speed reading was completely wrong (the kind of wrong that’s not even funny).
The fix came down to the display settings—specifically speed pulses and the correct output mode—plus understanding the wiring on newer FarDriver harnesses.
On my controller, the one-line communication wire was tied into what’s labeled as the brown boost wire, which is extremely counterintuitive the first time you see it.
Once it was wired correctly and the display parameters were set appropriately, the speed display started behaving.
Battery Protection: Setting a Cutoff That Makes Sense
With a powerful battery setup, I didn’t want to guess my cutoff settings.
I set low voltage protection based on the battery’s safe cutoff. Beyond that, I also calibrated how the controller interprets “full” using the full battery coefficient setting, so the percentage reading is more accurate.
This matters because a controller that understands state of charge better can behave better near low battery—without nuking the pack.
Bench Test Vibes (and That Motor Sound)
After the tune changes, I did a bench test just to confirm everything was behaving.
The motor has a distinct sound that people always comment on—almost like it’s got a personality. More importantly, the bike now responds like a complete system: throttle in, throttle out, and no weirdness in between.
Why I’d Consider a Custom Tune (Instead of Copy/Paste Settings)
I’ve tried the “grab settings from the internet” method before. Sometimes you get lucky; usually you don’t.
A pre-made tune can’t account for the real variables that matter:
Your throttle’s voltage range
Your battery behavior under load
Wiring quality and voltage drop
Your specific motor and how it likes to be driven
Once my tune was tailored to my build, the difference wasn’t subtle.
Plug-and-Play Potential for the EGO Mini Bike
The EGO mini bike is attracting a totally different crowd than the typical e-bike builder—lots of power-tool folks who are comfortable DIY’ing, but new to controller tuning.
I’m genuinely excited about the idea of more plug-and-play upgrade paths for this platform, where someone can taste the benefits without jumping straight into an extreme build.
What We Like
FarDriver app makes troubleshooting more direct (it will actually tell you what’s wrong)
Throttle tuning can be dialed for safety or aggressiveness depending on your comfort level
Field weakening settings can unlock top-end potential when staged correctly
Off-throttle regen can feel natural with the right low-speed adjustments
Display can be made accurate once speed pulses/output settings and wiring are sorted
Things To Consider
Bluetooth dongles can be temperamental; don’t overlook this as a failure point
Some generic throttles can trigger errors and block setup steps like auto-learn
Display wiring isn’t always intuitive, especially across FarDriver harness generations
Field weakening increases demand; it’s something to tune thoughtfully, not just max out
Proper battery cutoff and calibration matter if you want performance without abusing the pack
Final Thoughts
This was the point in the build where everything started feeling legitimate.
I’m not just chasing speed—I want the bike to feel clean, controllable, and predictable. With the FarDriver tuned properly, I finally feel confident moving on from the “wires everywhere” stage and into finishing the install cleanly, tightening up the cosmetics, and keeping that sleeper mini-Grom look.
If you’re building an EGO mini bike (or any FarDriver-powered project), tuning isn’t optional. It’s the difference between a bike that technically works and a bike you actually want to ride.